JupyterLite Transformation Dialog
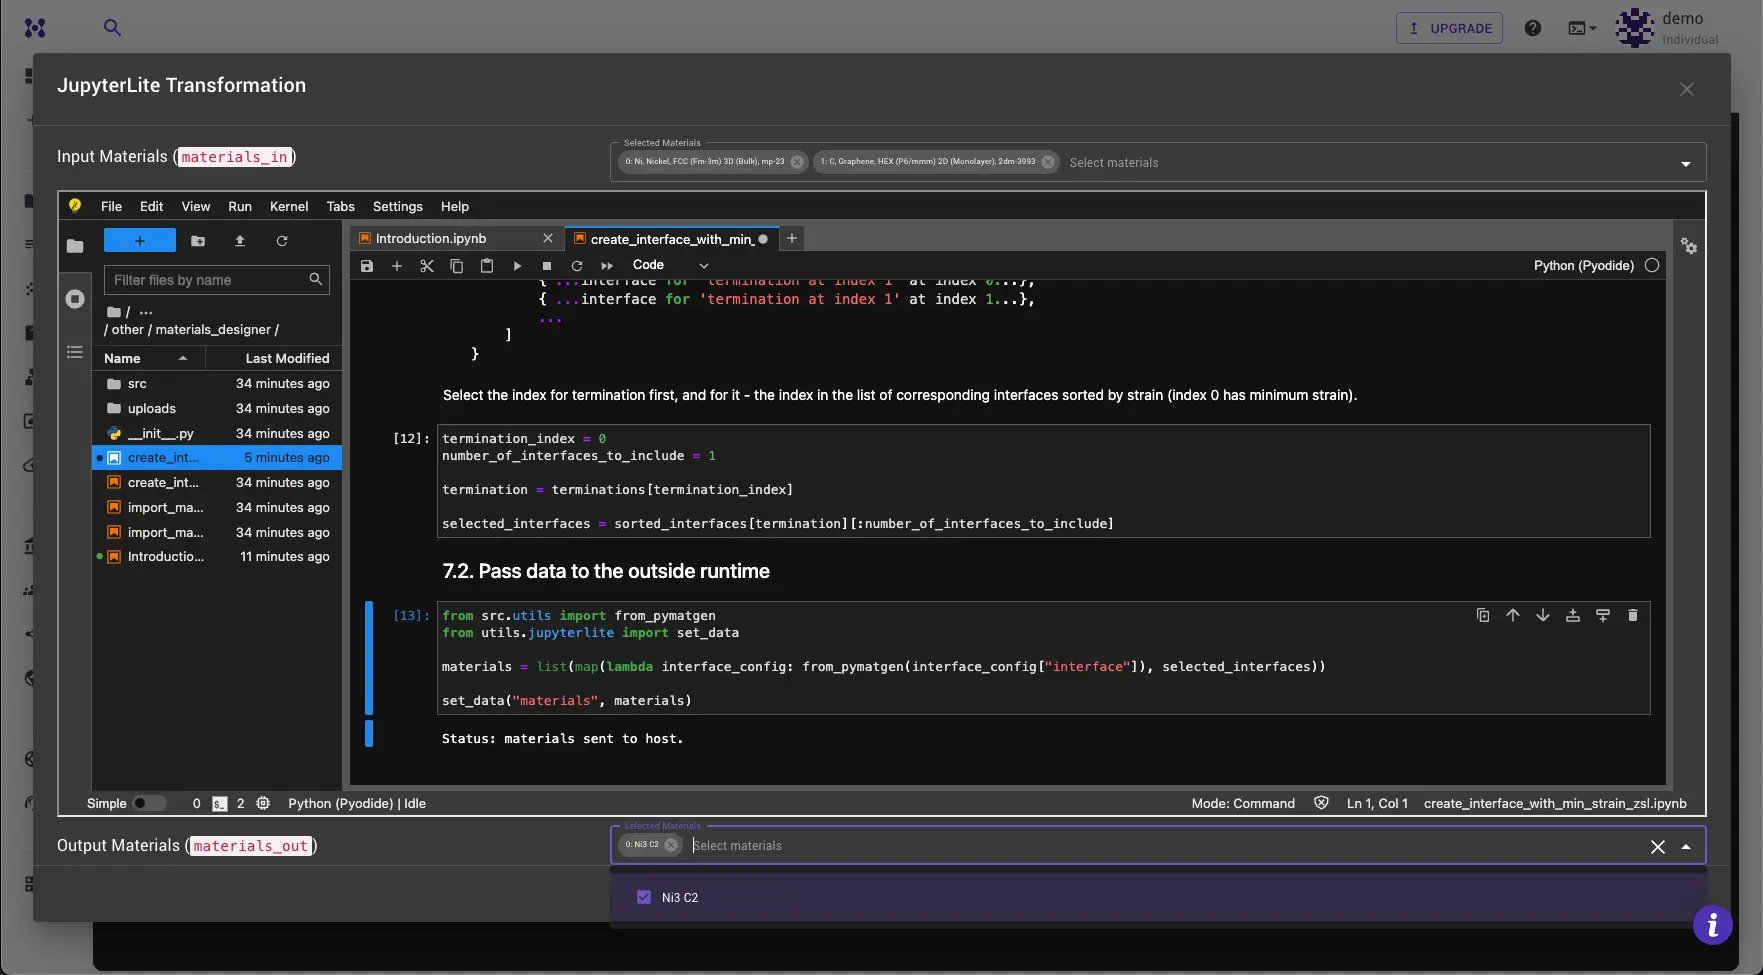
The JupyterLite Transformation Dialog enables the modification of materials using Python, Jupyter notebooks with widely used packages (e.g. numpy, pymatgen, ASE, etc.) within the JupyterLite environment, a lightweight implementation of JupyterLab that runs entirely in the web browser.
Open Dialog
This dialog is accessible via the "Advanced" menu option.
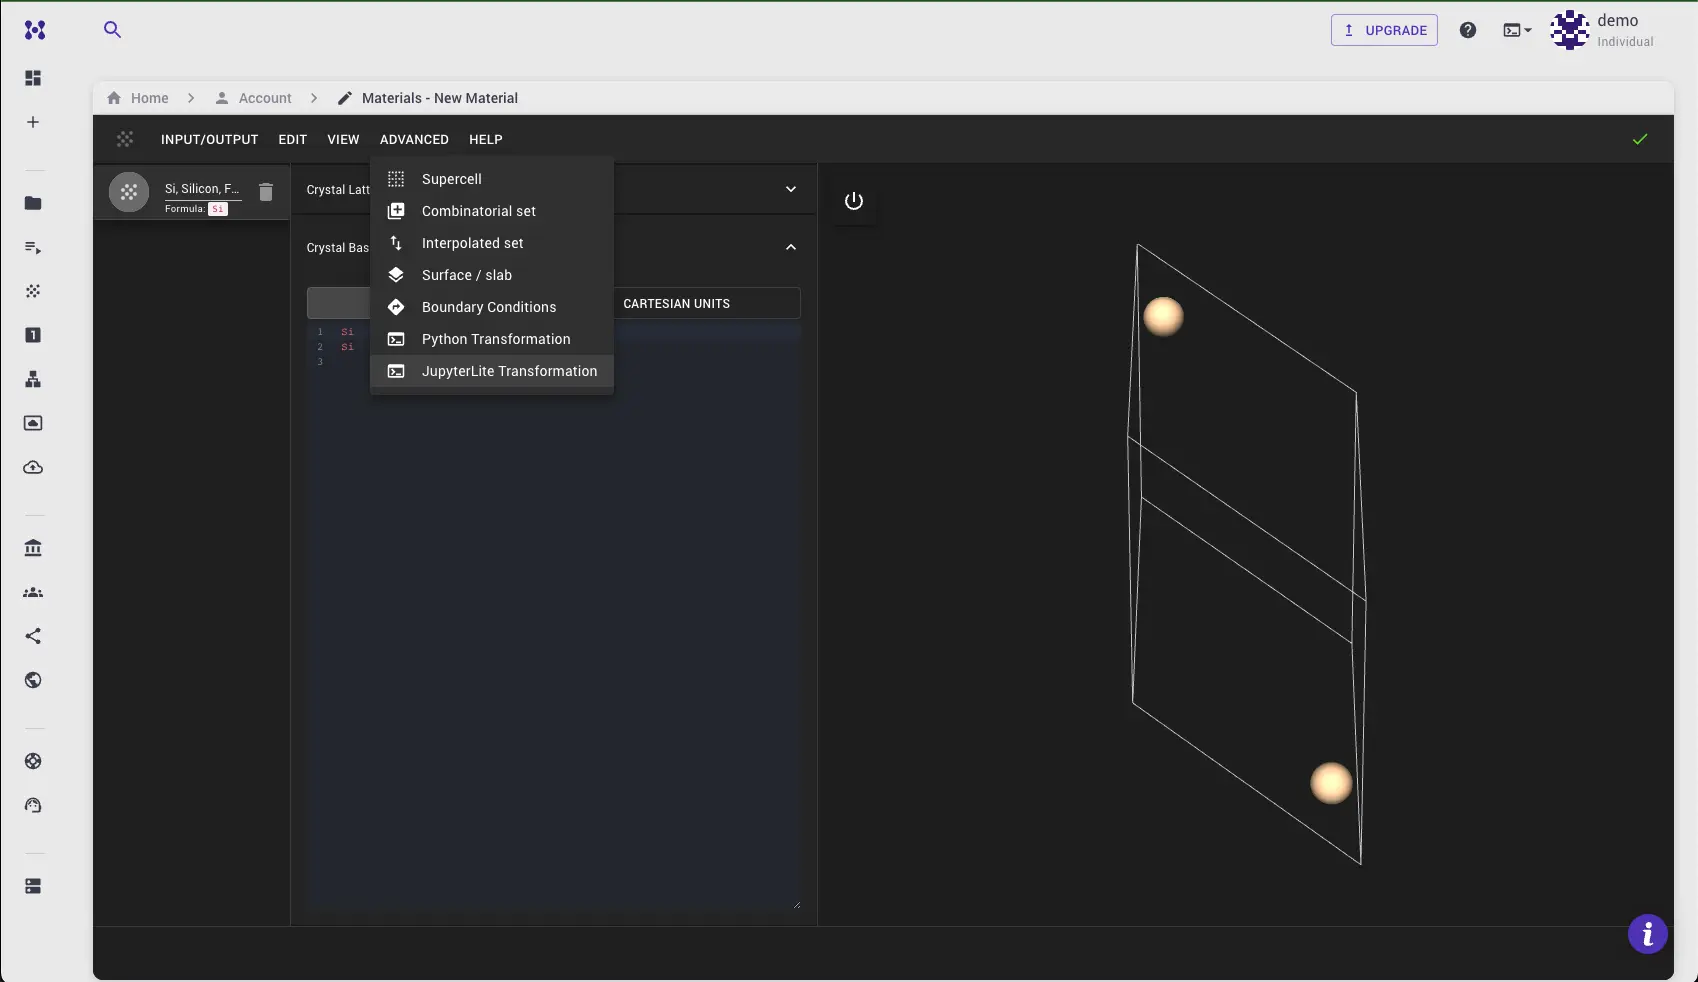
JupyterLite Environment
The Dialog facilitates access to JupyterLite Environment where materials from the main application are available.
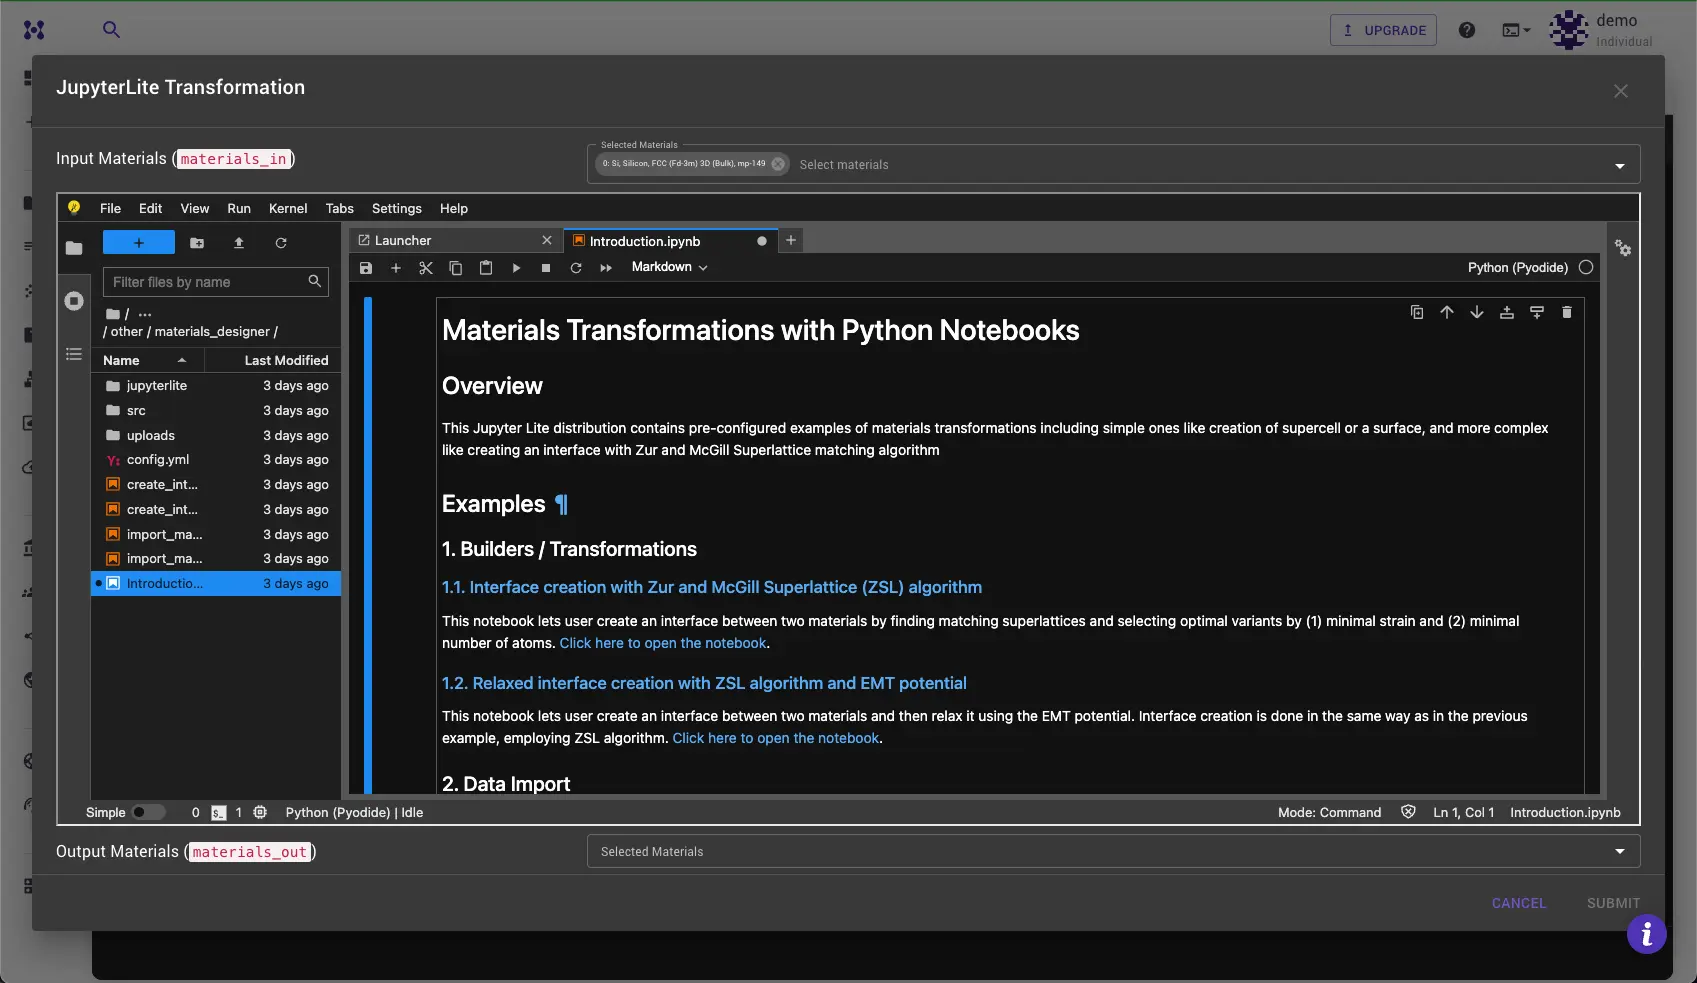
Select Input Materials
At the top of the dialog, a drop-down menu allows for the selection of materials to be transferred to the JupyterLite environment. These materials will then be available for further processing within.
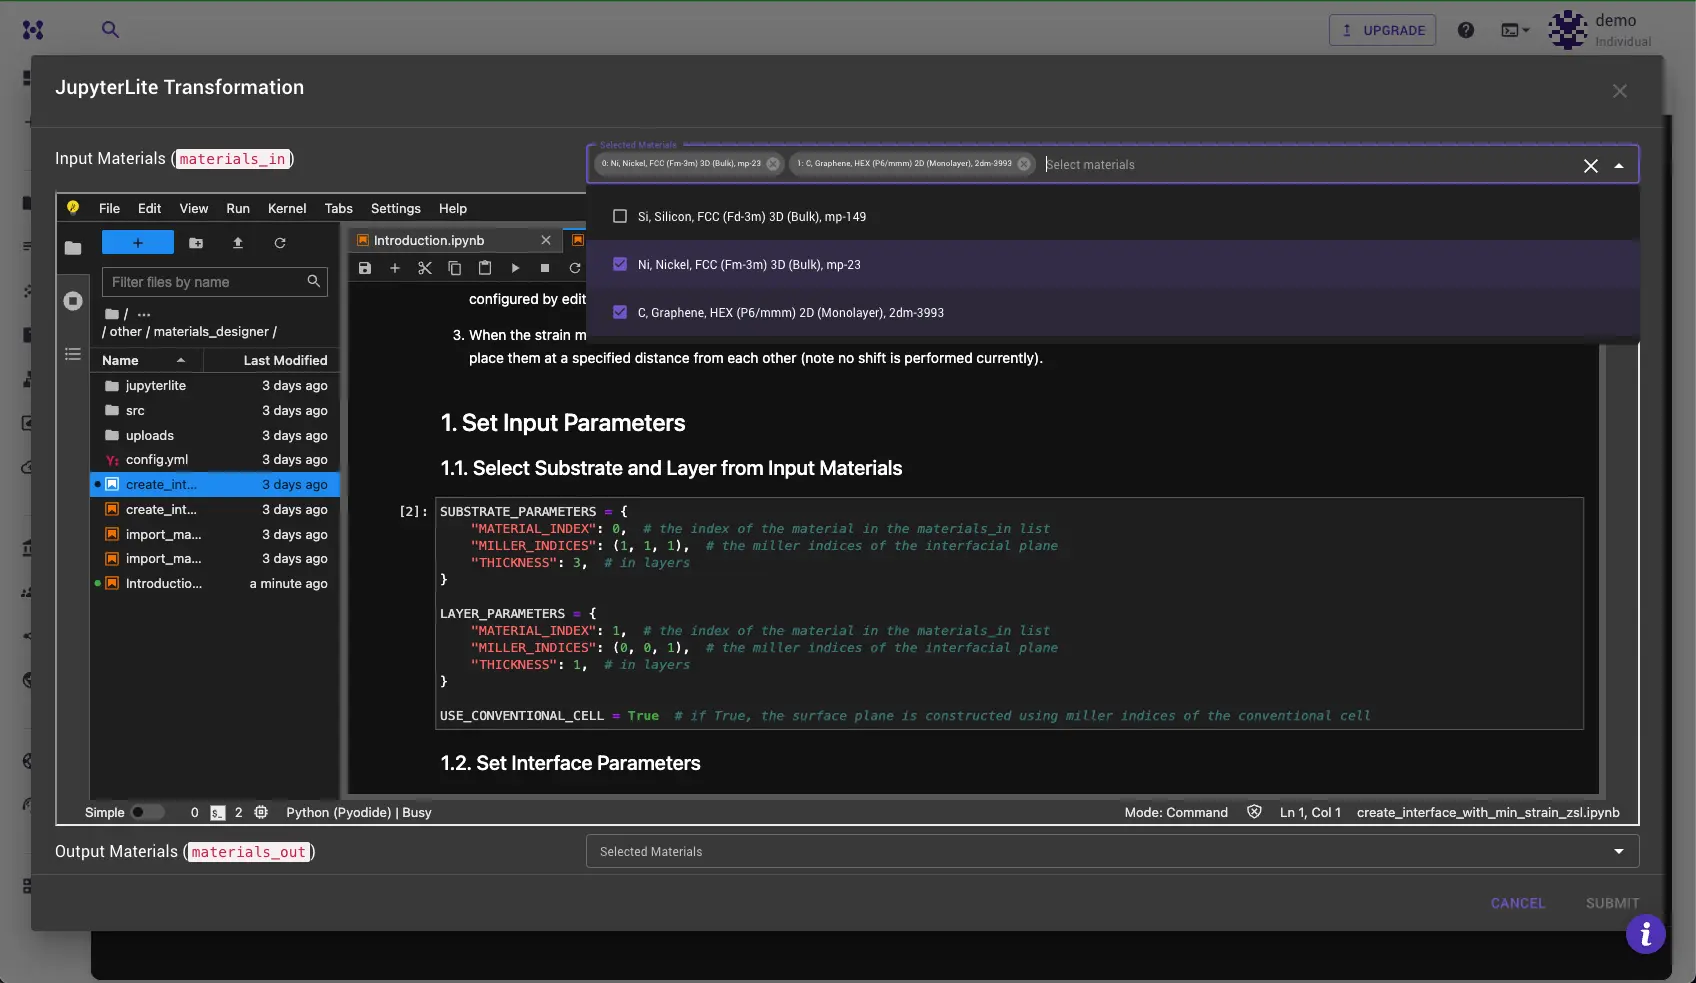
Apply Transformation
To apply a transformation, open the notebook containing the desired transformation from the list provided in the Introduction.ipynb notebook. Follow the instructions within to apply the transformation to the selected materials. Typically, this process involves specifying settings for the transformation and clicking "Run All Cells."
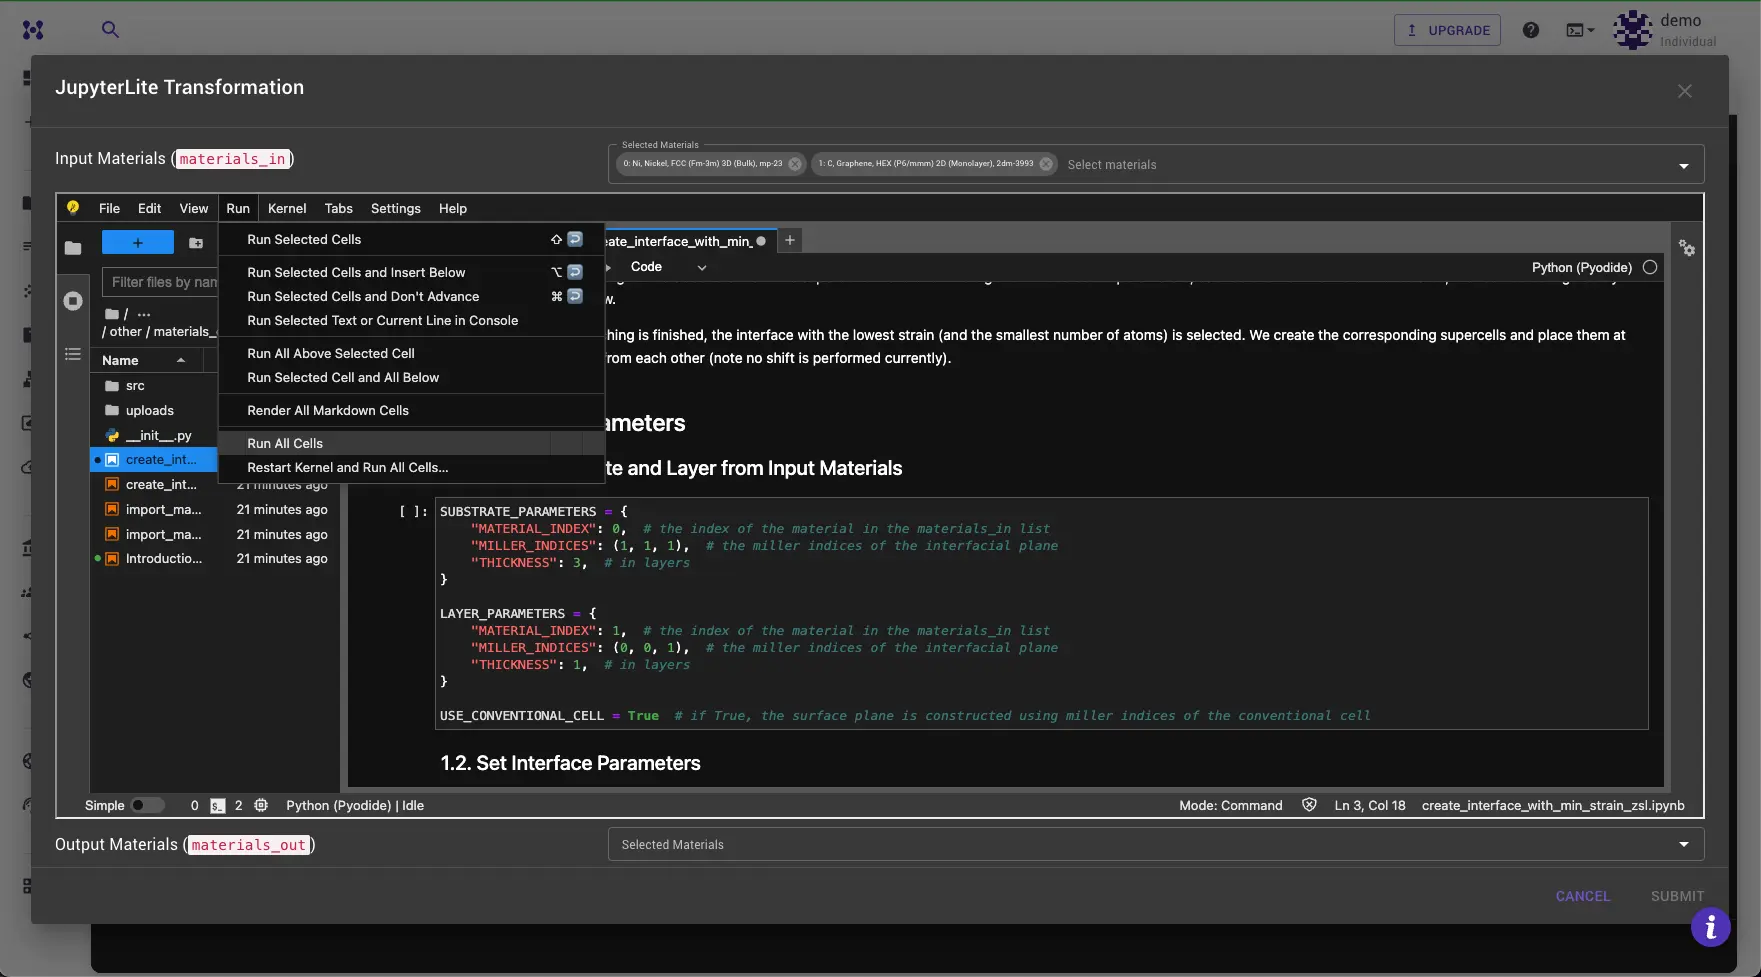
Access Materials in JupyterLite
Learn how to access materials inside the JupyterLite environment launched from Materials Designer in Introduction to JupyterLite.
Submit Results
In most cases the result of the transformation is a set of materials that can be passed back to the Materials Designer. They will appear in the "Materials Out" dropdown at the bottom of the dialog. Select the materials you want to pass back to the Materials Designer and click the "Submit" button to complete the transformation.
Animation
The following animation illustrates how to use the JupyterLite Transformation Dialog to create a matching interface between two surfaces using Zur and McGill's algorithm.