Command Line Interface via SSH
Users can connect to the Command Line Interface (CLI) of our platform using an SSH terminal client under any Operating System (OS), as an alternative to the Web Terminal.
We use SSH keys 1 to identify users and trusted computers during command line sessions. Keys provide improved security, but they must be properly set up before use. The steps on this page will guide you through generating SSH keys and adding them to your account.
Experienced users who are already familiar with how SSH clients operate under their preferred Operating System can navigate directly to the Upload SSH key section below.
SSH Client
Make sure you have a SSH client installed in your computer. We particularly recommend the following SSH clients.
-
OpenSSH2: the standard protocol in Unix-based OSs (both Linux and macOS distributions) for connecting through SSH via the terminal.
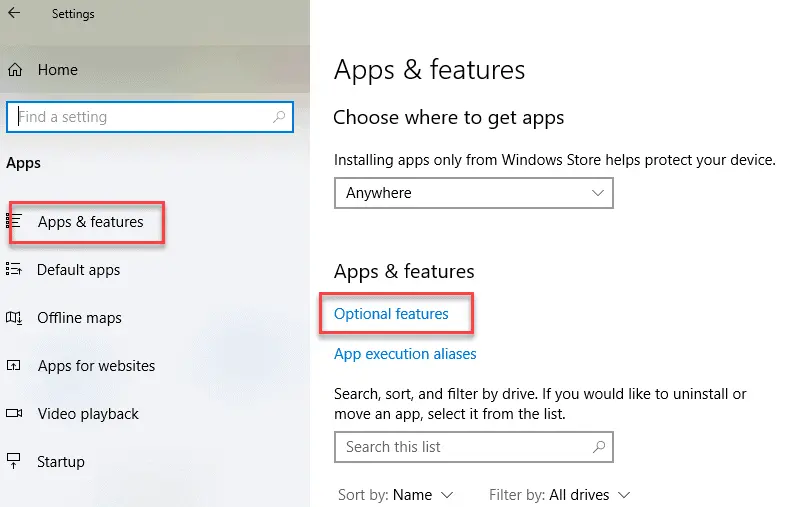
Starting from Windows version 10, OpenSSH client is included as a Windows Feature. Please expand below section if OpenSSH is not enabled on your Windows computer. Once enabled, bothsshandscpcommands should be available via both PowerShell and Command Prompt.How to enable OpenSSH on Windows 10?
- Click on the Windows Start menu and search for Apps and Features.
Click on Apps and Features on the sidebar, then click Optional
Features.
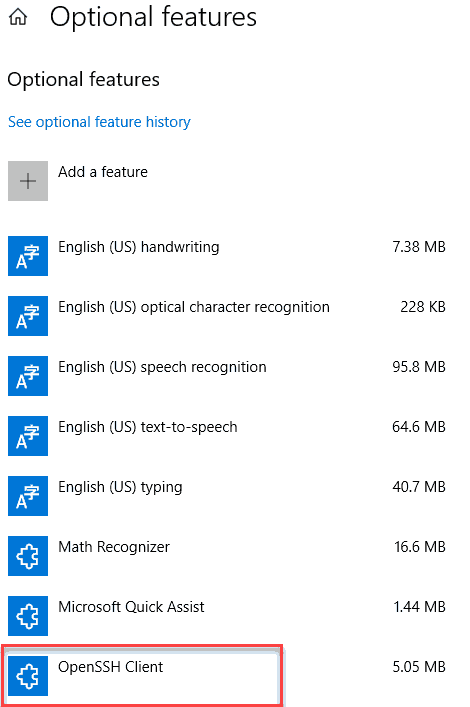
- Scroll down the list to check if OpenSSH Client is listed. Otherwise,
click the plus sign next to Add a feature, select OpenSSH Client,
and click Install.
- Click on the Windows Start menu and search for Apps and Features.
Click on Apps and Features on the sidebar, then click Optional
Features.
-
Putty3: a widespread SSH client for Windows users, can be used as an alternative to OpenSSH.
Generate SSH Keys
As introduced previously, SSH keys are necessary to connect to the CLI using the credentials for the account under consideration. You can create a RSA key of size 4096 bits with the following command:
ssh-keygen -t rsa -b 4096 -C "email@example.com"
-C flag refers to comment, which could be any identifier. You will be
prompted to specify a file to save the key. Press Enter to accept the default
location. When prompted, enter a secure passphrase for your key. This step is
optional but recommended for added security. After keys are generated, there
will be two files id_rsa and id_rsa.pub. Please upload the public key file
id_rsa.pub as described below.
Please refer to the external tutorials on the advanced usage of OpenSSH 4 and Putty 5 clients.
Upload SSH Key
After generating the keys, the public key need to be uploaded to our platform and associated with the user's account. This effectively establishes a secure link between the external SSH client and the corresponding Mat3ra account.
We explain how to upload the SSH keys to our platform in a separate section of the documentation.
Privacy of SSH keys
SSH keys are private and are meant to be used to identify exclusively the user with our platform. Any other user logged in with such private keys would automatically have access to the account's data and allocation, and because of this they should not be shared with anyone else.
Connecting to Mat3ra Server
Once the secure SSH link is established via the SSH keys, the remote Mat3ra server can be accessed as follows (the user should replace the text inside braces below with the corresponding names/paths).
Name of remote server
Our Mat3ra server for accepting remote connections is referred to under the
alias of "bohr", and is accessible via the corresponding address
login.mat3ra.com.
SSH using OpenSSH
-
The user should first change the permissions on the private key to be accessible to him/her only.
chmod 400 {path/to/your/private_key} -
At the command prompt, the user should then enter the following command.
ssh -i {path/to/your/private_key} {mat3ra.com_username}@login.mat3ra.com
Putty for Windows
Instructions on how to operate Putty to connect to our remote server can be
found in Ref. 6. The name of the server to be used in this case is the same
as before, namely login.mat3ra.com.
Enter the CLI
Following successful SSH connection, the user is presented with the CLI of our platform.
Some useful instructions are already contained in the CLI splash welcome screen greeting the user at the moment of login. A copy of this welcome screen is reproduced below.

Transfer Files with SCP
The user can also transfer files back and forth from his/her local hard drives
to the folders on the remote Exabyte server. For this purpose, we recommend the
SCP file transfer protocol 7, which is also based on SSH. Detailed
instructions on how to transfer files using scp is available
in a separate page.
Windows Instructions
Once OpenSSH client is enabled on Windows, scp command should be available via Windows PowerShell and Command Prompt terminals.
Alternatively, you may use WinSCP graphical user interface program 8. A tutorial demonstrating how to operate it can be retrieved in Ref. 9.
When using WinSCP, one would need to load the private key through its interface before connecting. Explanations on how to do so can be found in Ref. 10.