How to incorporate spin-orbit coupling effect in Quantum ESPRESSO
In this tutorial, we walk you through the steps of incorporating spin-orbit coupling effect in bandstructure calculation using Quantum ESPRESSO. We want to calculate the electronic bandstructure of Bi2Se3, a prototypical topological insulating material, featuring an insulating bulk and conducting surface states. The spin-orbit coupling effect of heavy bismuth atoms and presence of surface is necessary for the occurrence of Topological Dirac surface states.
1. Creating slab structure
We will need to create a slab structure for this calculation. Density Functional Theory calculation can only be performed on periodic systems. To obtain a surface by adding sufficient vacuum between the layers.
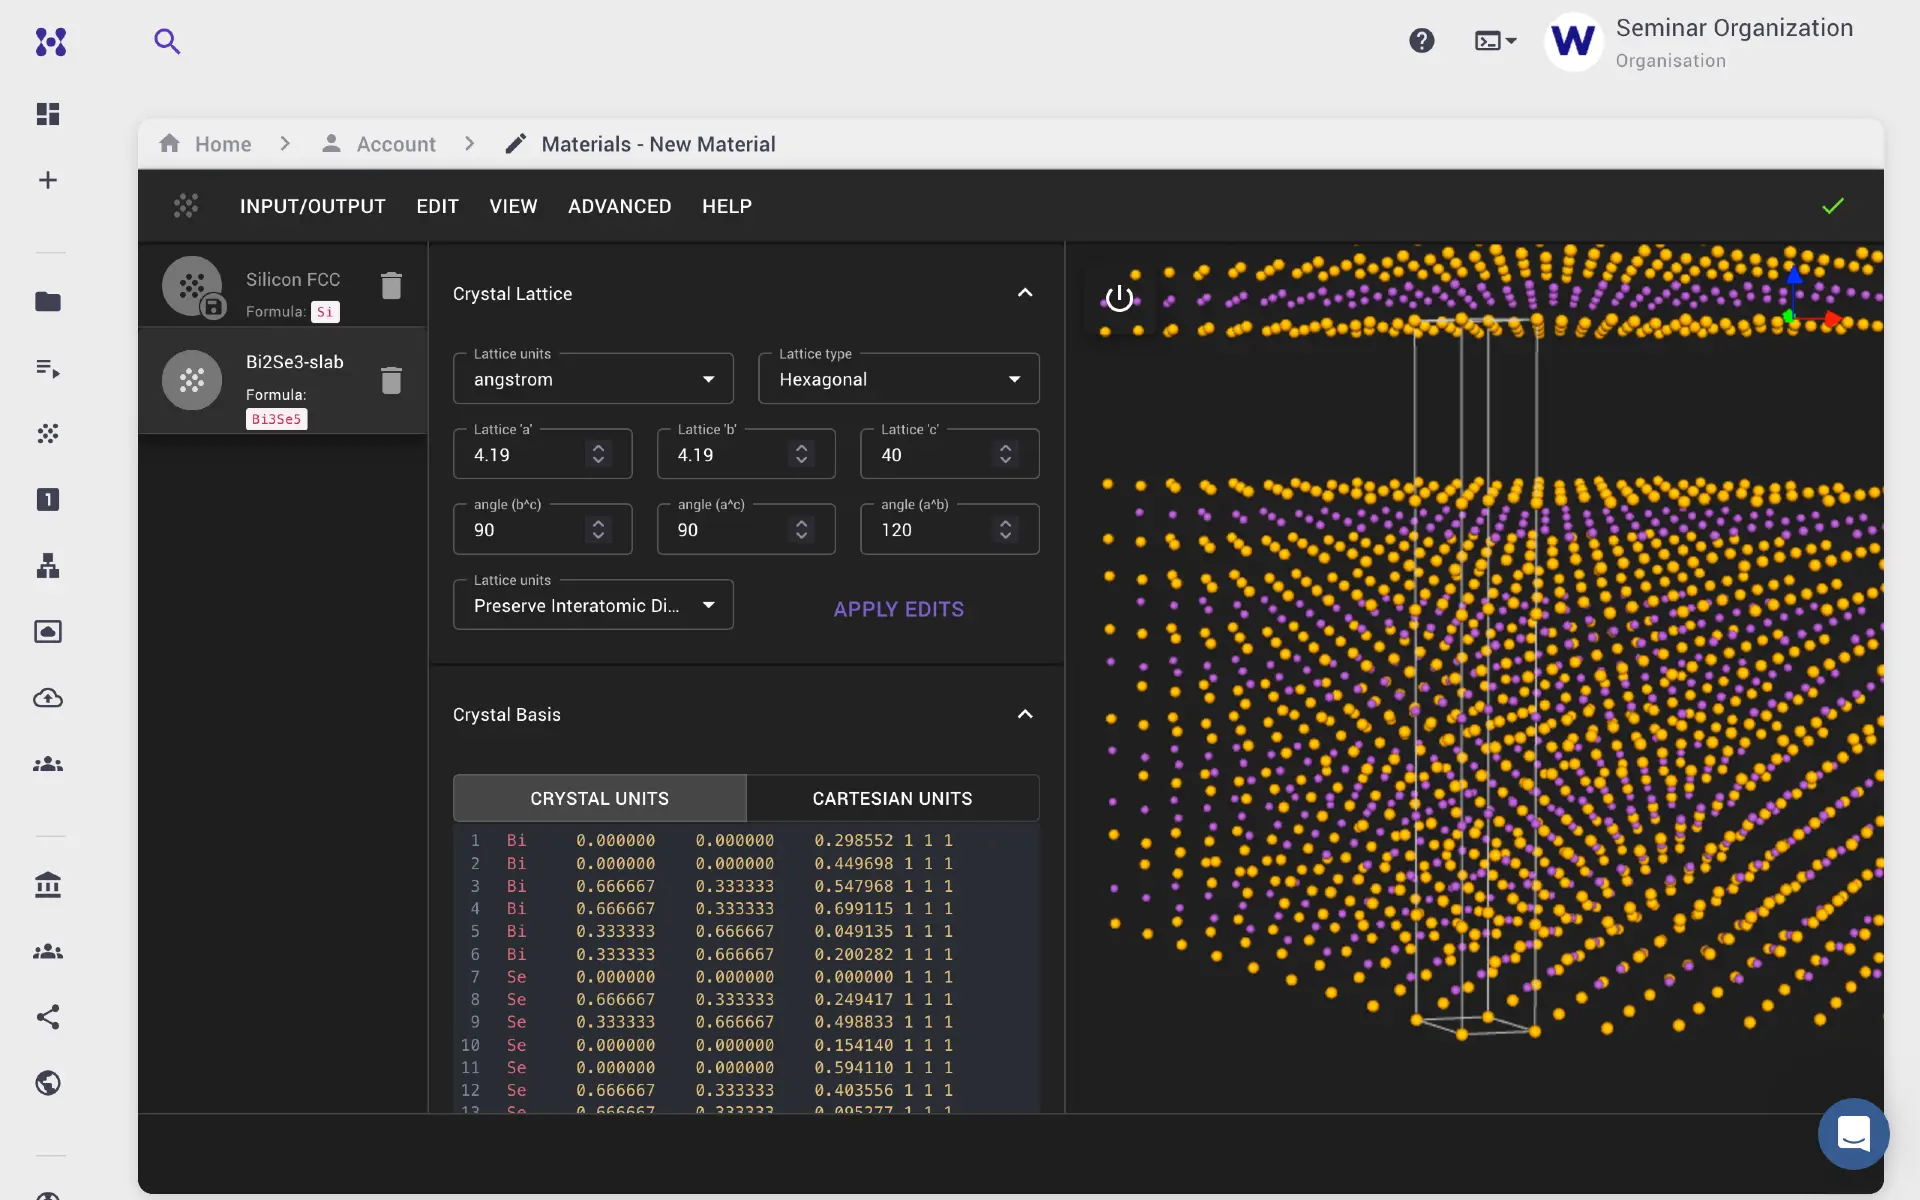
Navigate to the materials designer from the left sidebar, and click Create New material. Set the lattice type (hexagonal in case of Bi2Se3), original lattice constants, and atomic positions. Then select Preserve Interatomic Distance and increase to lattice vector c to add vacuum to the ab-plane.
2. Create workflow
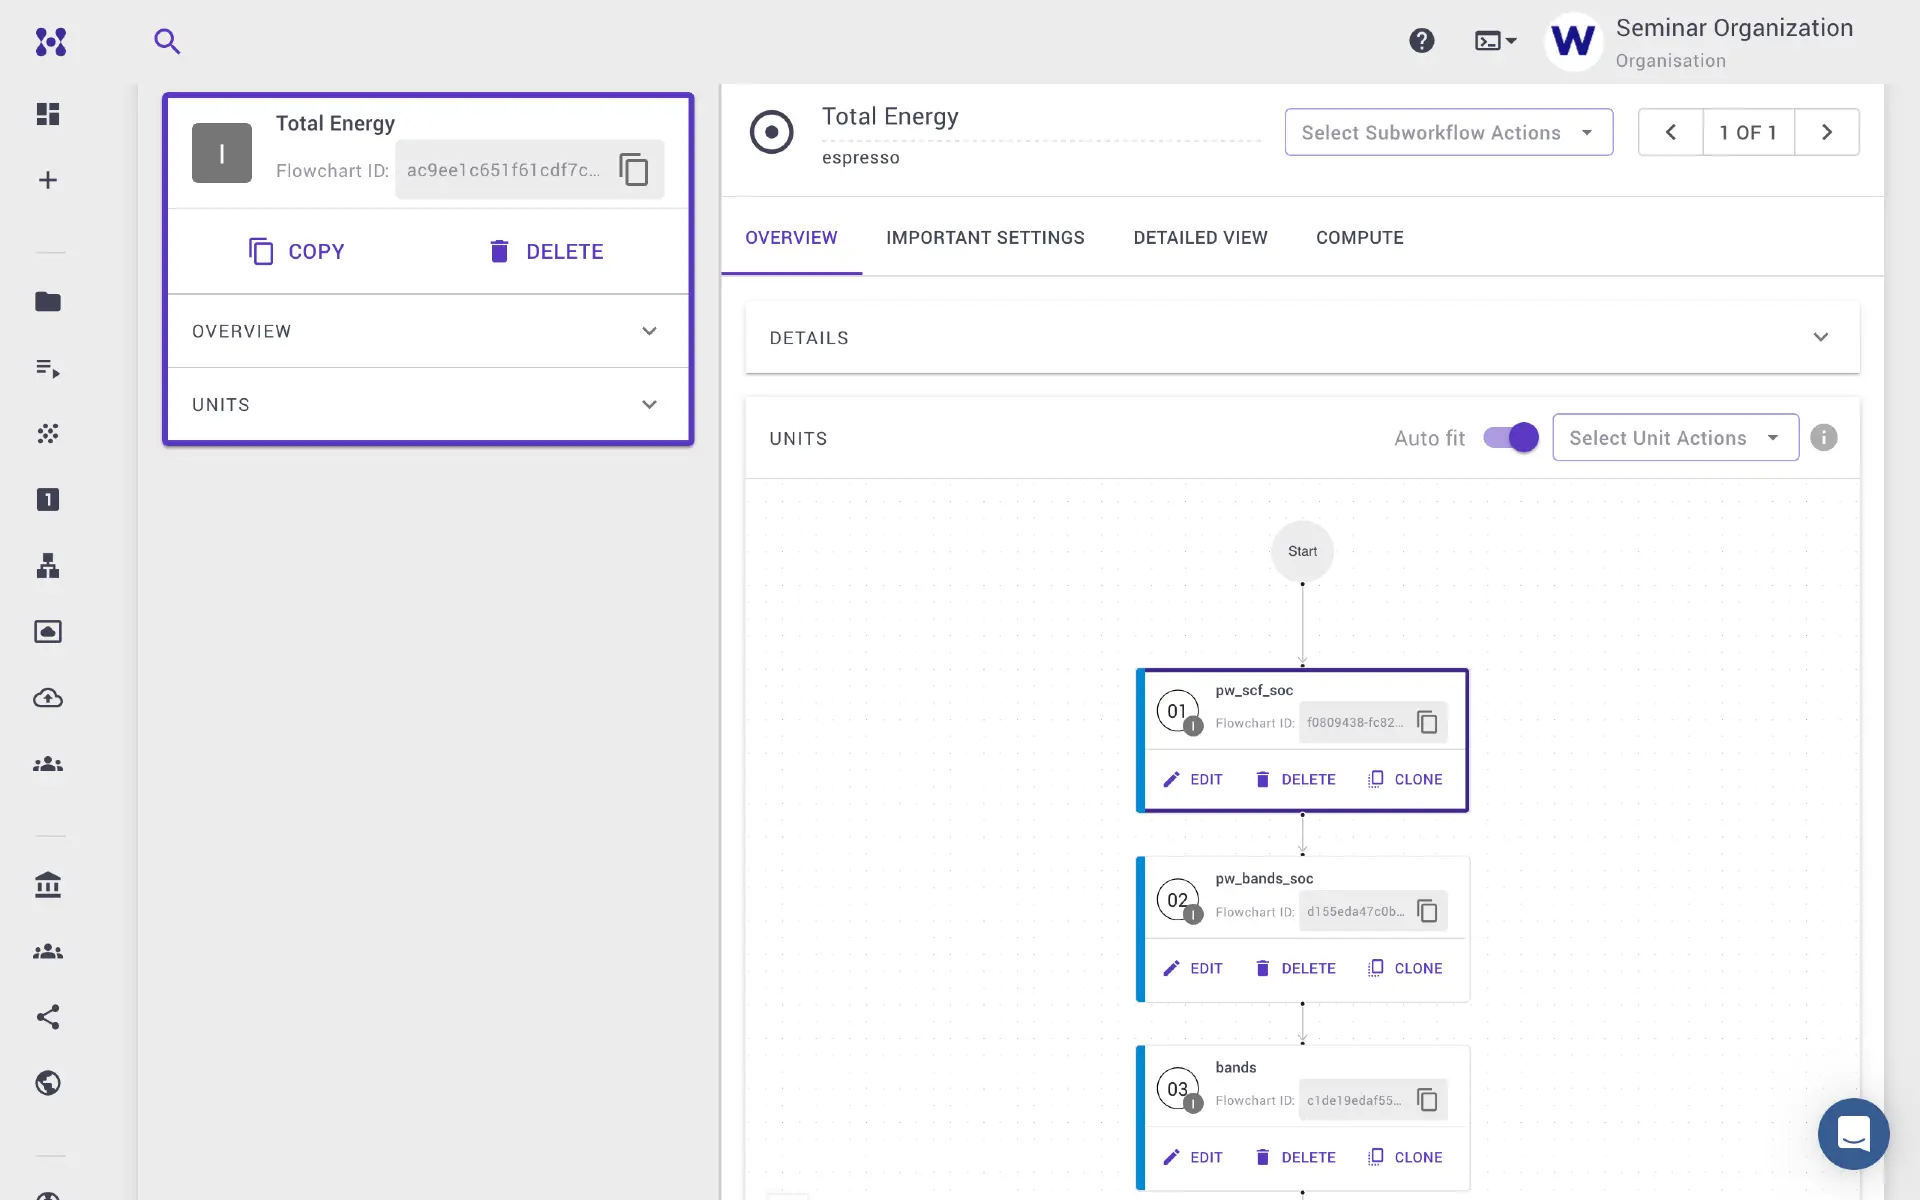
We need to specify the workflow following workflow steps to obtain the bandstructure with the spin-orbit coupling effect:
- Perform self-consistent field (SCF) calculation
- Perform bands (NSCF) calculation along specific k-path
- Post-processing of bands calculation
Note that for SOC calculation, we need to select fully relativistic pseudopotential.
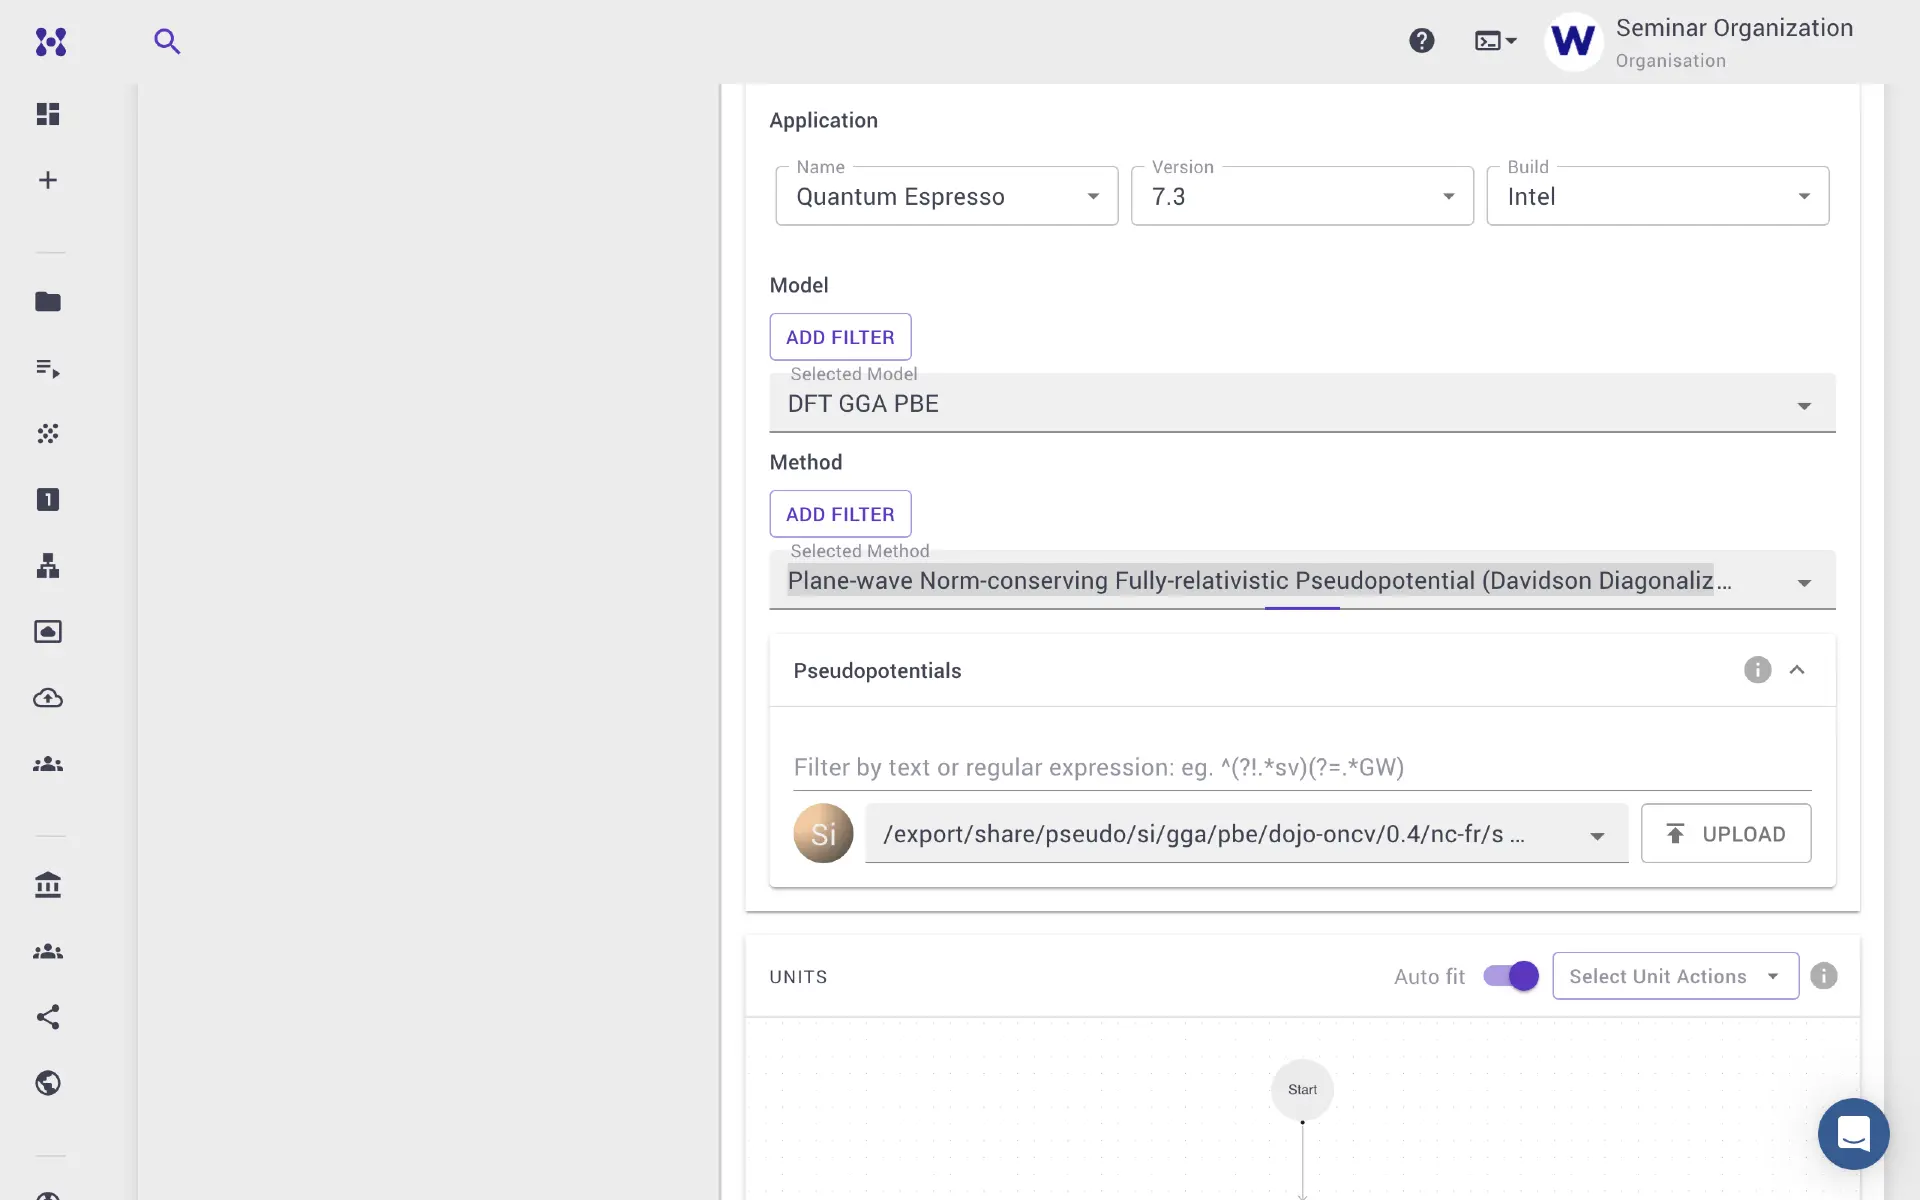
2.1. Self-consistent field calculation
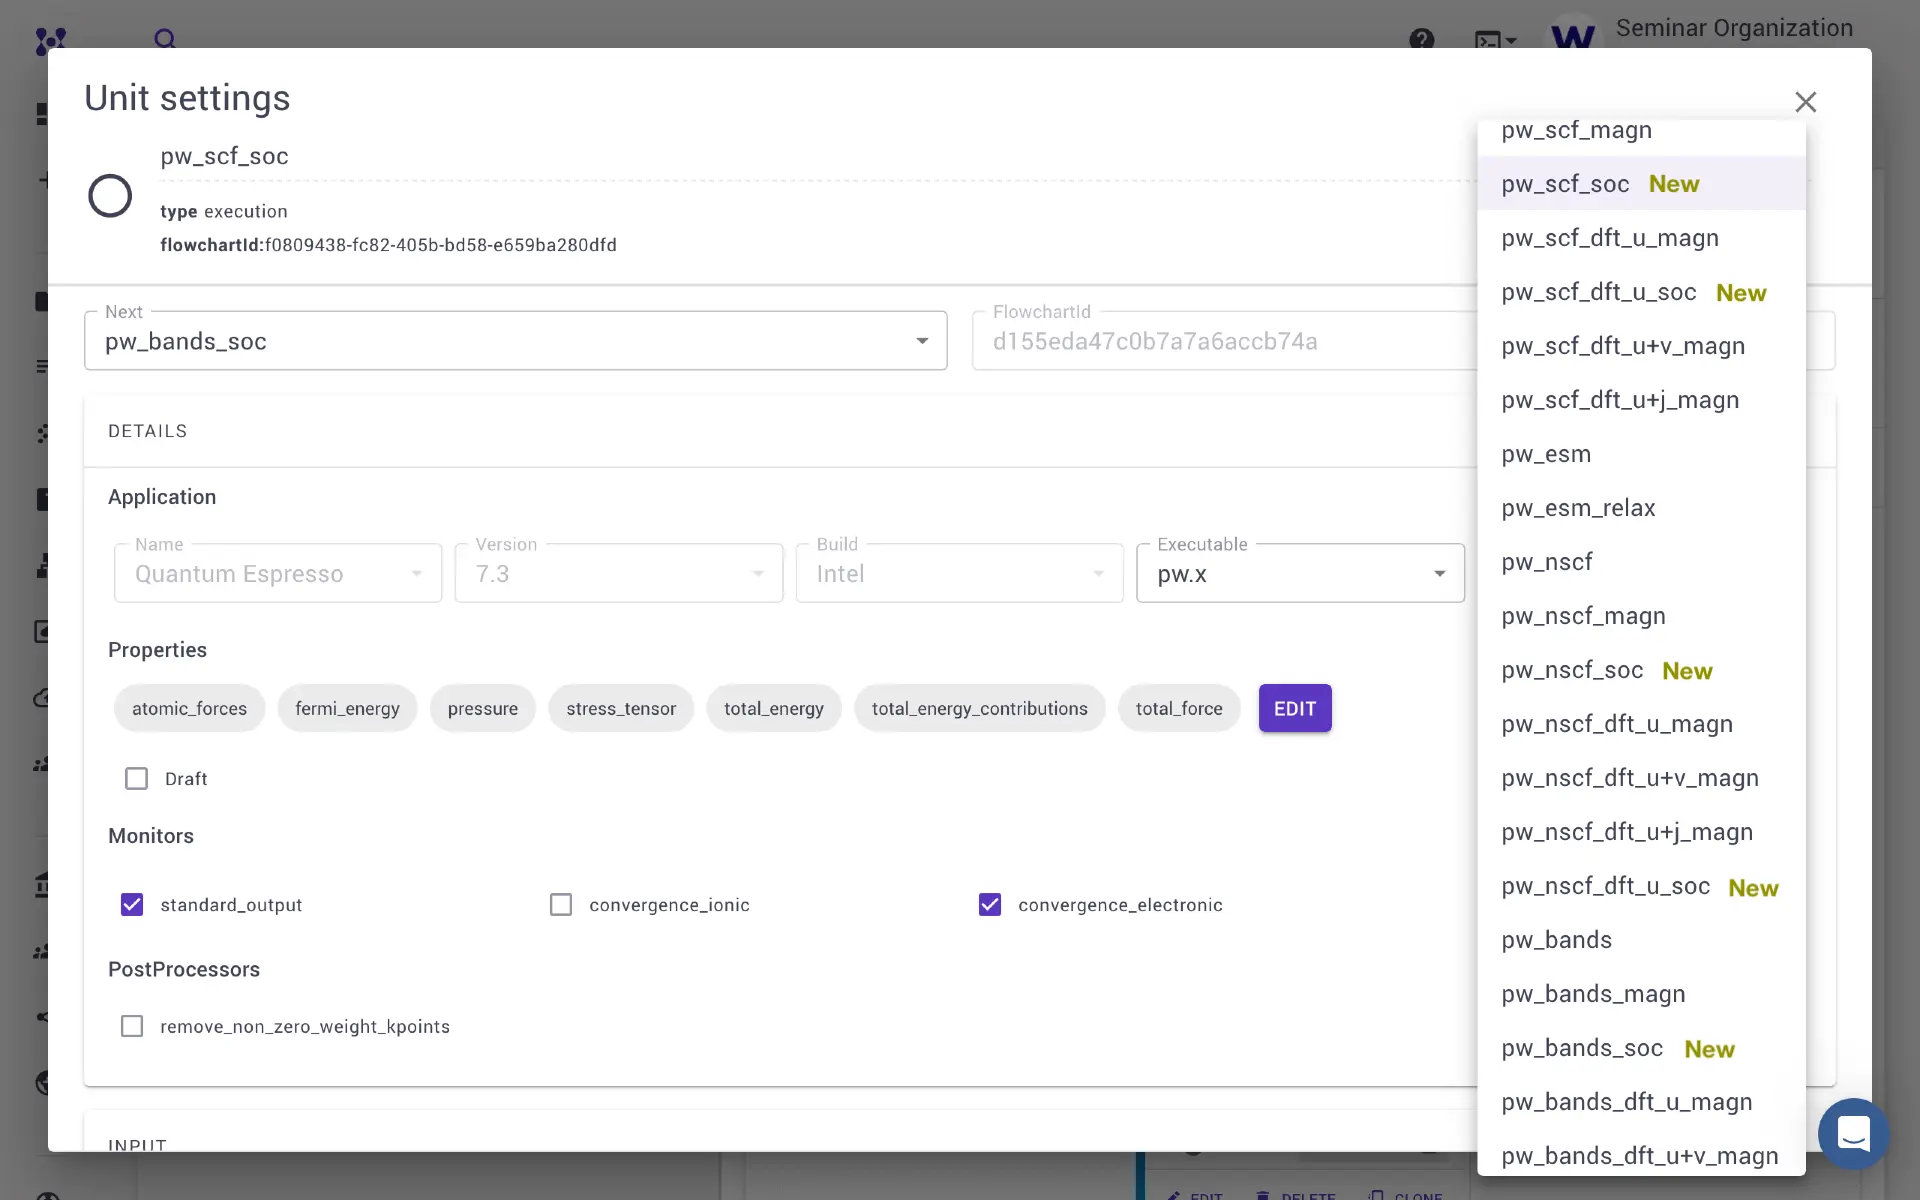
Add an execution unit, and select pw_scf_soc template, there are few other SOC templates that you may explore, for example, SOC in conjunction with the Hubbard U calculation.
2.2. PW Bands calculation
Add the next execution unit for PW bands calculation. Here we select pw_bands_soc template. The K-path and number of points between the K points can be specified in the Important Settings tab.
2.3. Bands.x postprocessing
Finally, we add another unit for postprocessing of our bands data. This is an optional step for the post-processing of the bandstructure data.
3. Job designer
Navigate to the jobs designer page from the left sidebar and click Create New job. Select material and workflow.
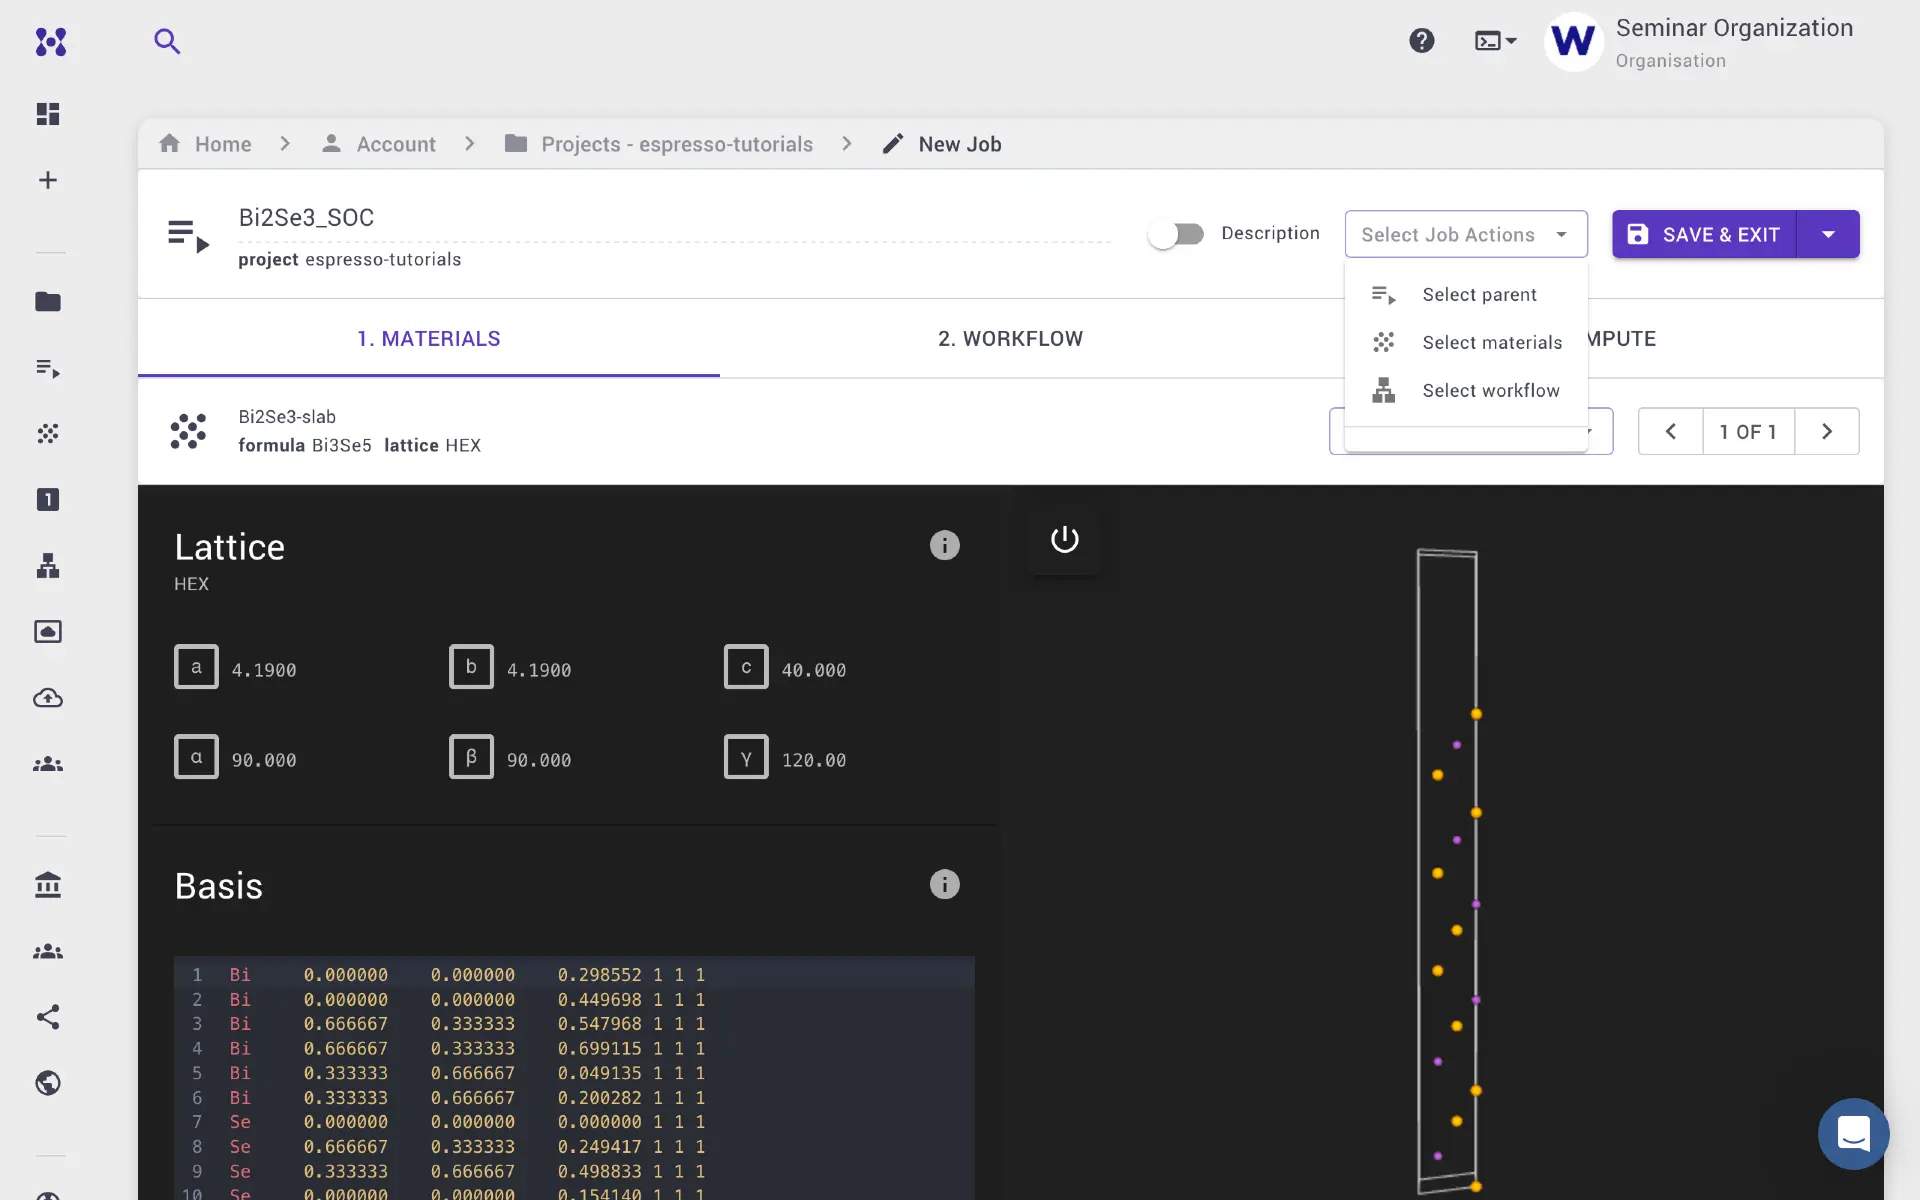
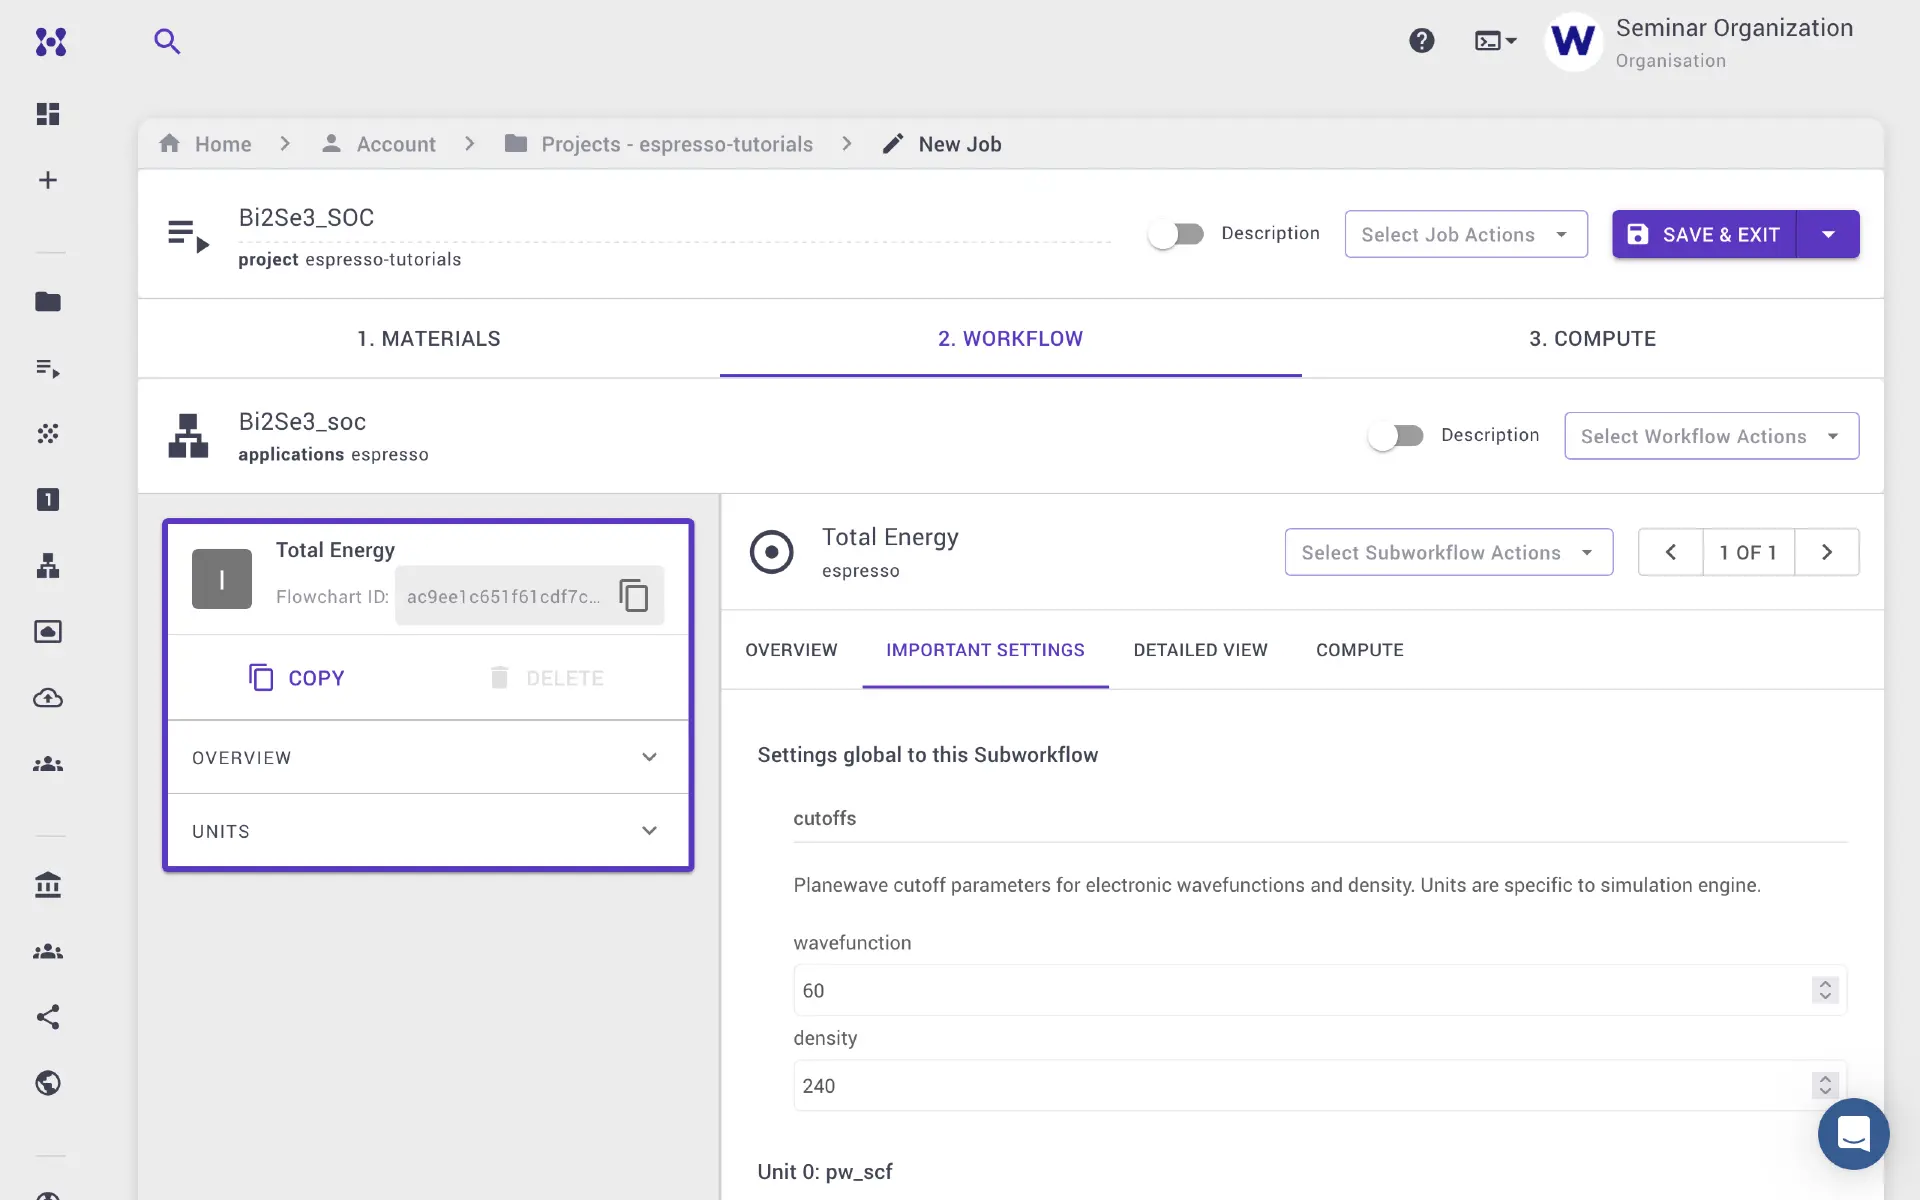
We can further edit the workflow units, and set various parameters under the Important Settings tab. Here we can set the k-grid density, starting magnetization, K-path, etc. SOC calculations are slower to converge, it is possible to start a SOC calculation from a previously converged SCF charge density that was performed without SOC, which takes shorter time than starting calculation without any starting charge density.
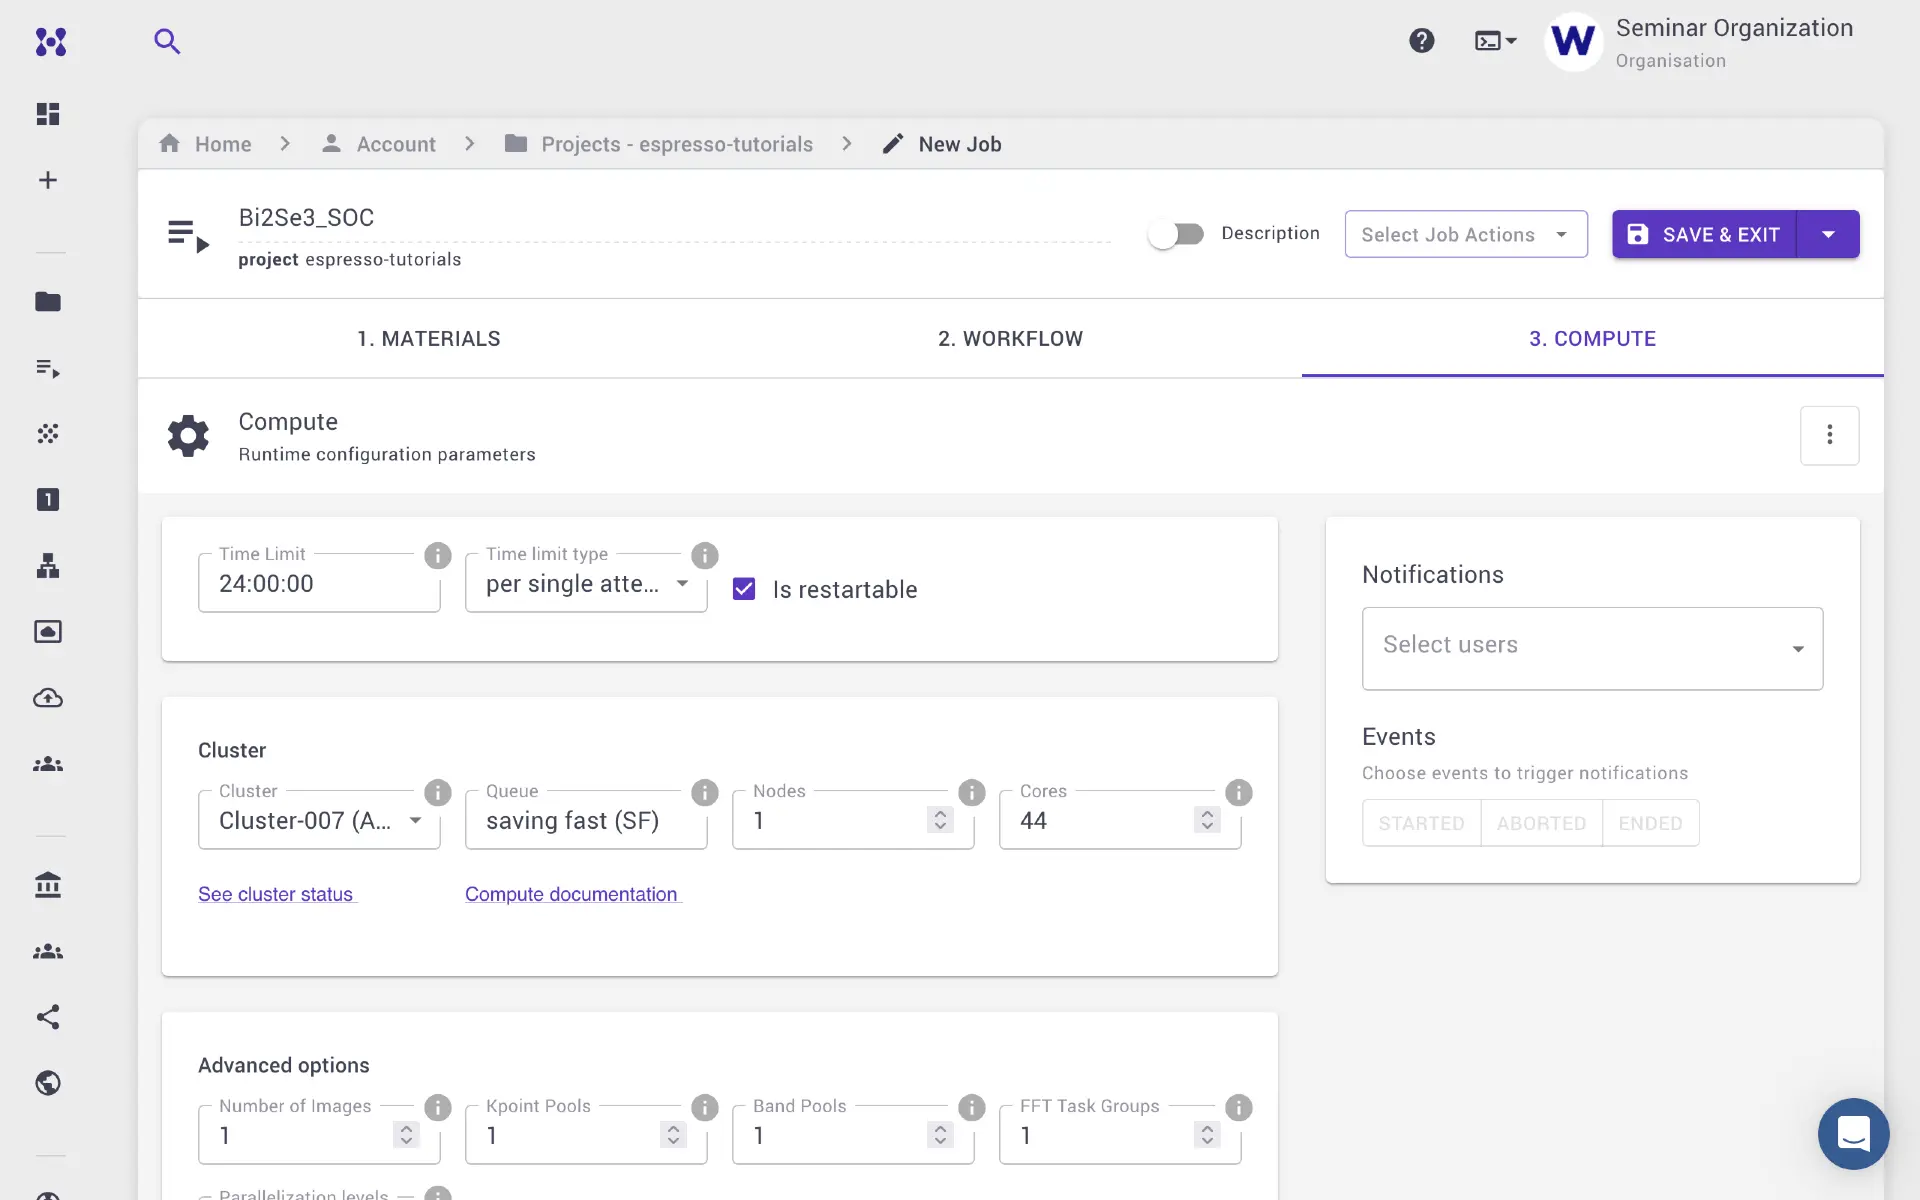
Navigate to the Compute and set various computer parameters, such as, time limit for a given calculation, queue, number of nodes, and number of processor cores per node.
Save and exit job designer, now hover over the job, and click the run button to submit job.
4. Results
Once the job is finished, navigate to the Results tab for a quick view of the summary of various results including the bandstructure plot. With sufficient convergence criterion (k-grid density, cutoff energies, convergence threshold, etc.), we should see conducting Dirac surface states for slab calculation. We can repeat the calculation for bulk, and identify the surface states by comparing the. For bulk-only calculation, there should be a bandgap. All output files are available under the Files tab. One may use Jupyter notebook session in our platform, or download the files to the local computer for further analysis.
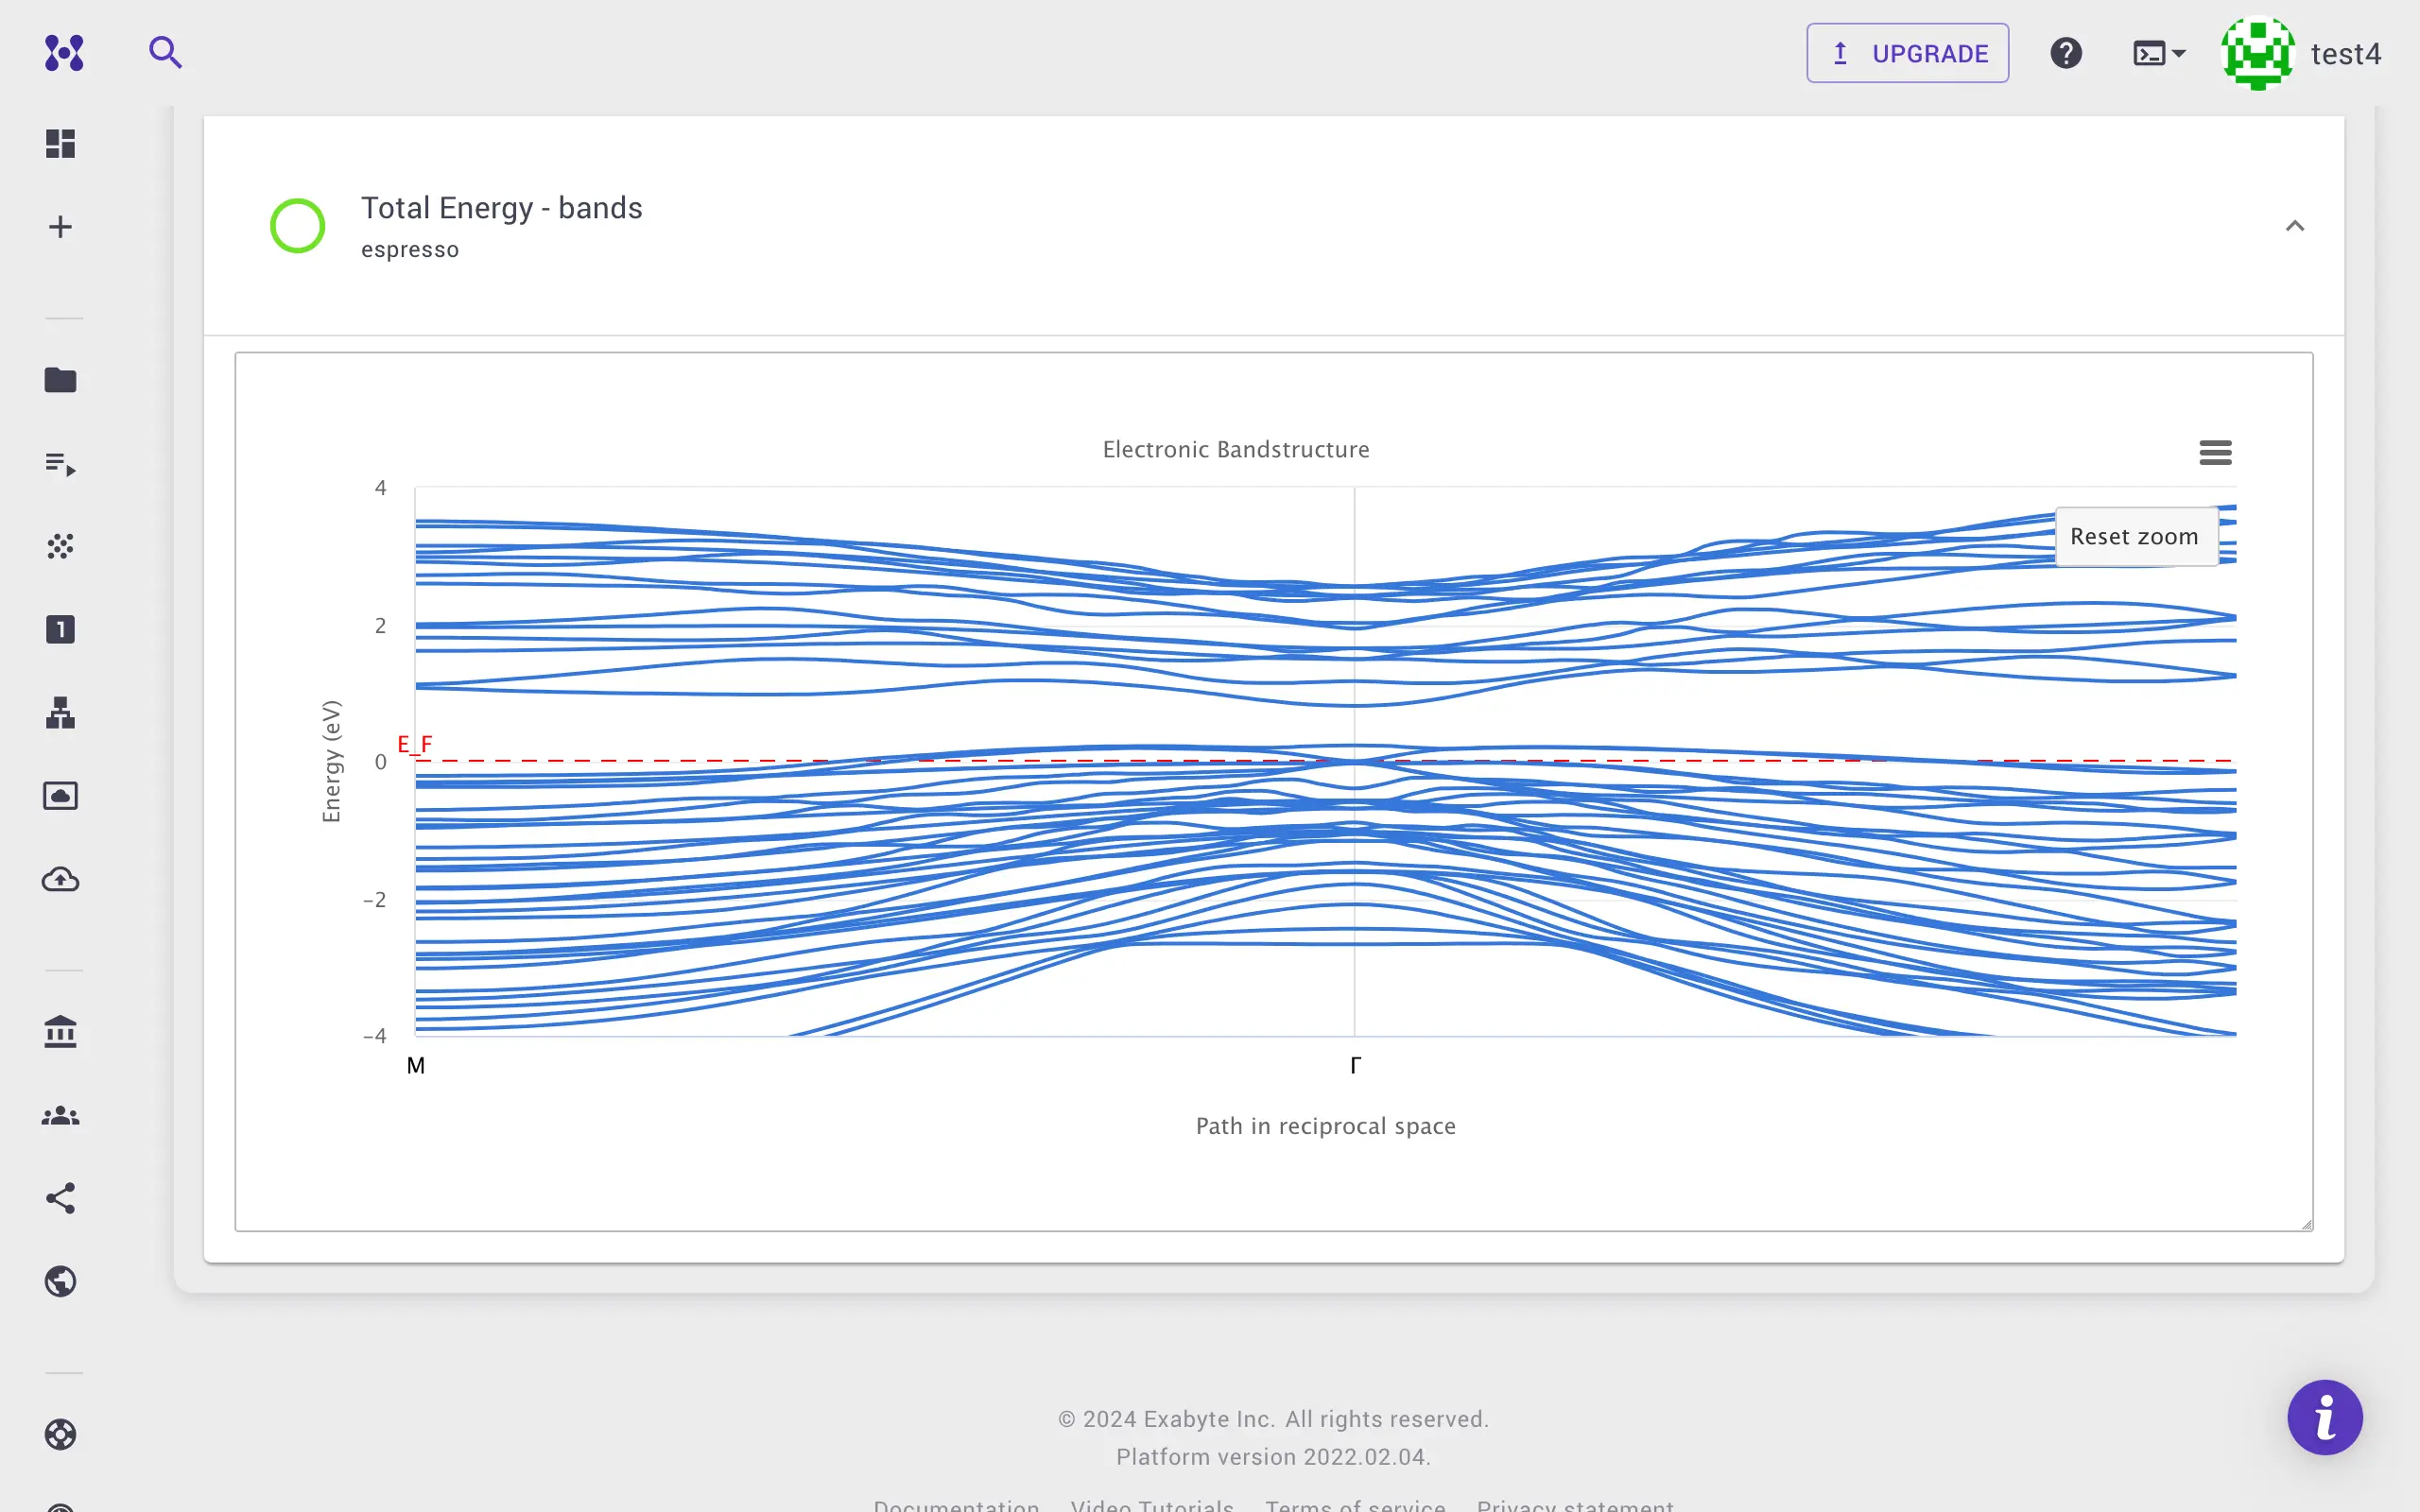
Note that above bandstructure plot in the result tab is obtained using coarse convergence criterion. We need more stringent convergence parameters to see the topological Dirac states clearly.
Step-by-step screenshare video
In the below video, we go through an example calculation.