Strontium Titanate Slabs.
Introduction.
This tutorial demonstrates the process of creating strontium titanate (SrTiO3) slabs based on the work presented in the following manuscript, where the electronic properties of SrTiO3 slabs are studied.
Manuscript
R. I. Eglitis and David Vanderbilt "First-principles calculations of atomic and electronic structure of SrTiO3 (001) and (011) surfaces" Phys. Rev. B 77, 195408 (2008) DOI: 10.1103/PhysRevB.77.195408 12
We will focus on creating SrTiO3 (011) slabs with different terminations from FIG. 2.
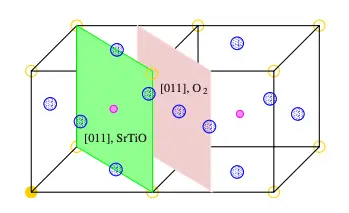
1. Create Strontium Titanate Slab.
1.1. Load Strontium Titanate Material.
Navigate to Materials Designer and import the strontium titanate material from the Standata.
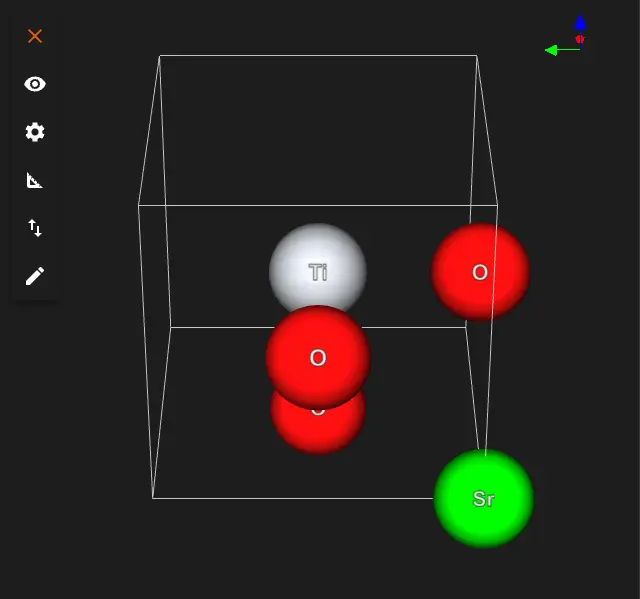
1.2. Launch JupyterLite Session.
Select the "Advanced > JupyterLite Transformation" menu item to launch the JupyterLite environment.
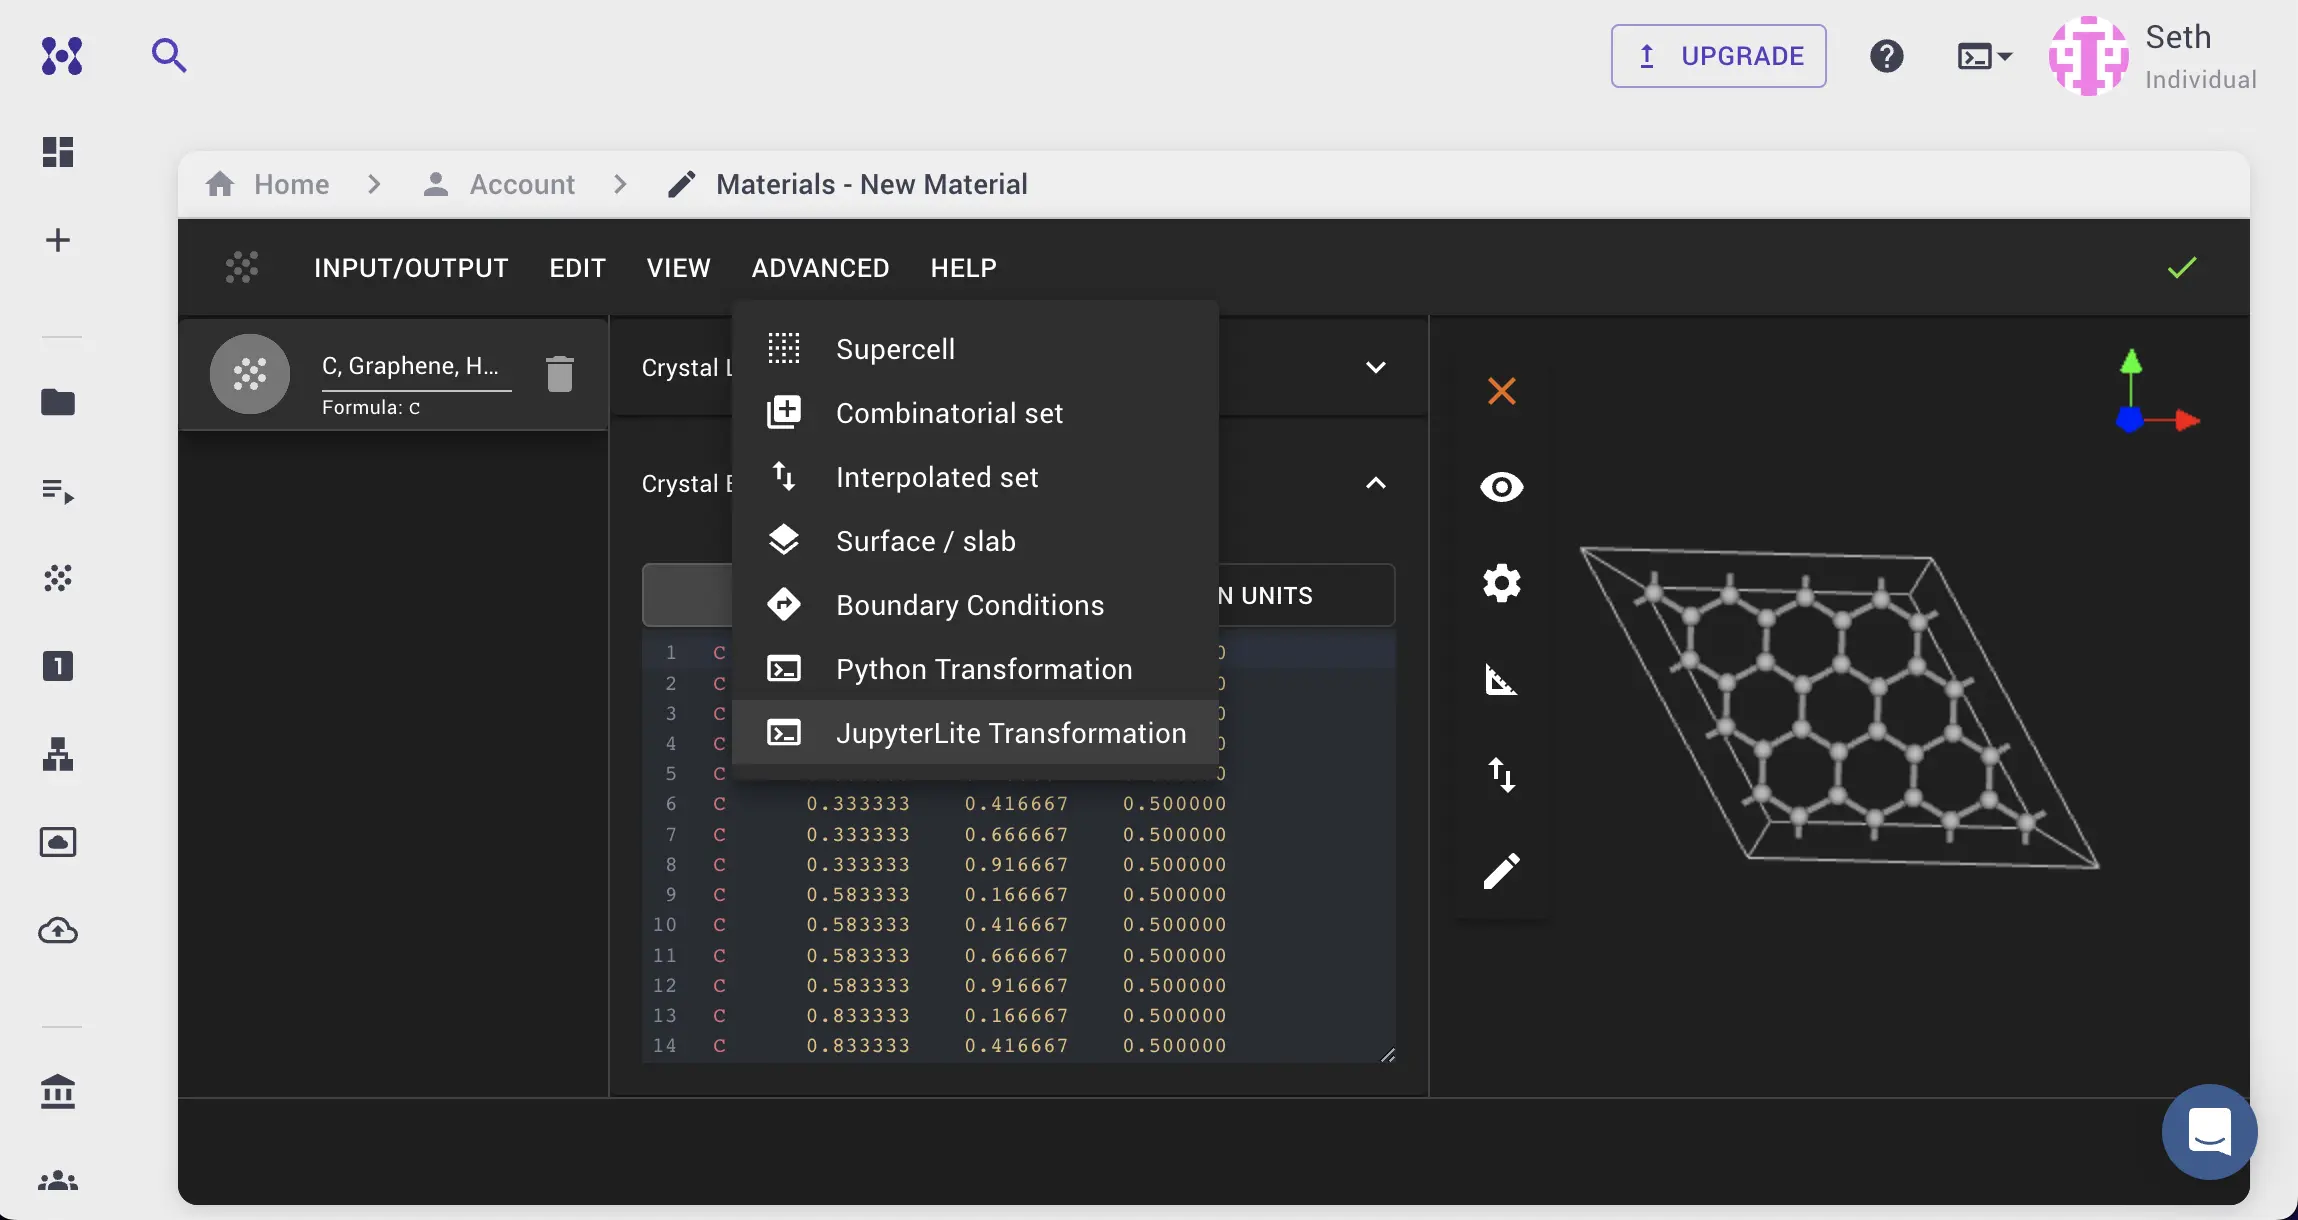
1.3. Open create_slab.ipynb notebook.
Find create_slab.ipynb in the list of notebooks and click/double-click open it.
1.4. Open and modify the notebook.
Next, we need to create a SrTiO3 slab with the (011) orientation.
We'll specify the orientation of the slab with Miller indices of (0,1,1) as described in the manuscript.
The rest of the parameters can be left as default.
The notebook detects possible terminations and allows for selection.
Terminations can be selected interactively by setting the IS_TERMINATIONS_SELECTION_INTERACTIVE flag to True and after running the notebook waiting for the prompt to select the termination.
Edit notebook in 1.1. to set parameters of slab:
# Enable interactive selection of terminations via UI prompt
IS_TERMINATIONS_SELECTION_INTERACTIVE = False

MILLER_INDICES = (0, 1, 1)
THICKNESS = 3  # in atomic layers
VACUUM = 10.0  # in angstroms
XY_SUPERCELL_MATRIX = [[1, 0], [0, 1]]
USE_ORTHOGONAL_Z = True
USE_CONVENTIONAL_CELL = True

# Index of the termination to be selected
TERMINATION_INDEX = 0

In the case of some terminations not being detected, we'll need to rotate input material before creating the configuration by adding rotate(material, axis=[1,0,0], angle=10) (angle set in degrees) to the cell 1.3. Get input materials:
from utils.jupyterlite import get_materials
from mat3ra.made.tools.modify import rotate

materials = get_materials(globals())
material = materials[0]
material = rotate(material, axis=[1,0,0], angle=10)
This will allow for symmetry breaking and correct detection for all possible terminations.
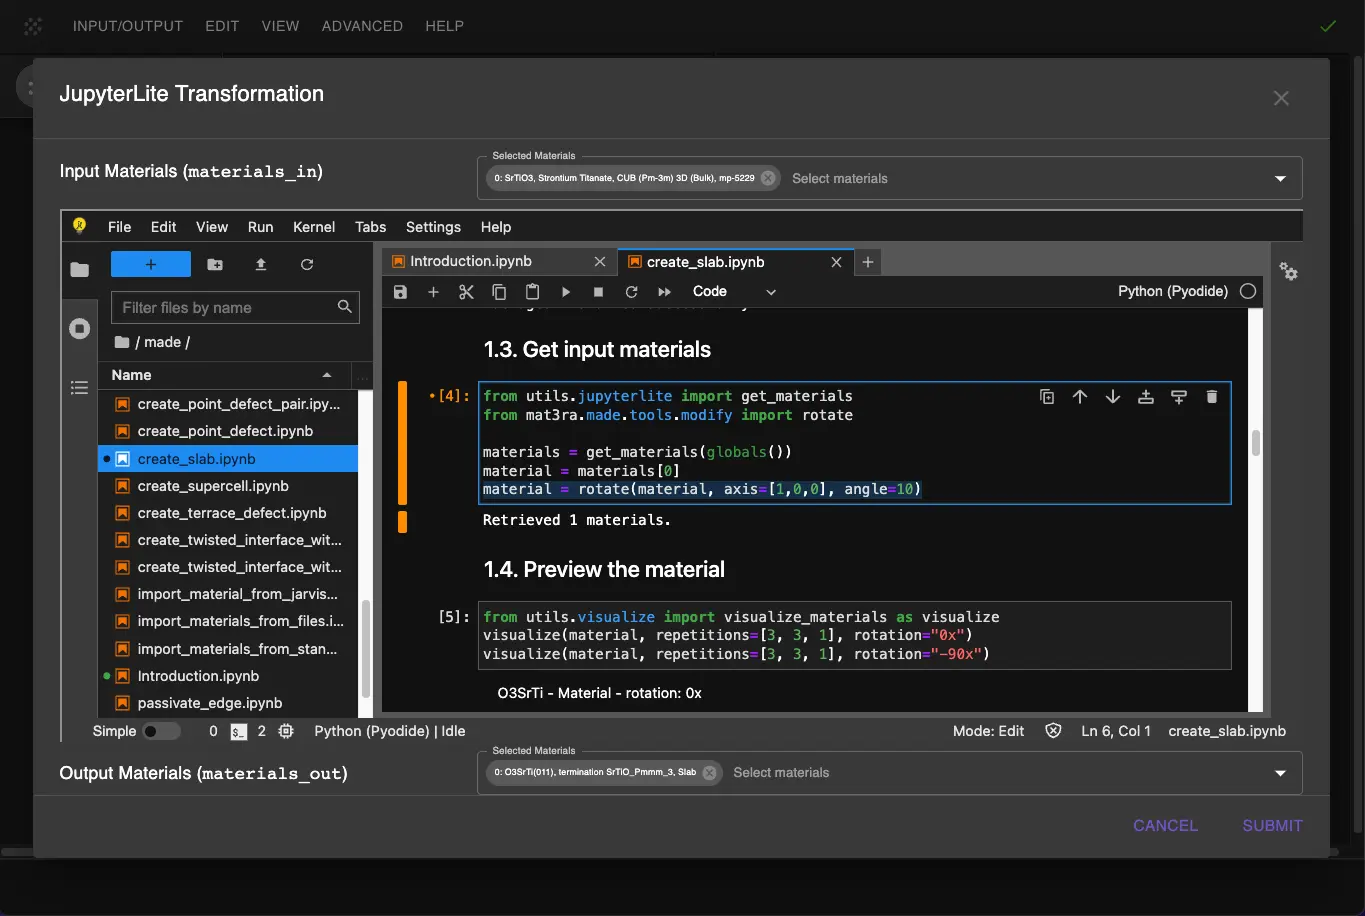
1.5. Run the notebook.
After setting the parameters, run the notebook by selecting "Run > Run All Cells" from the menu.
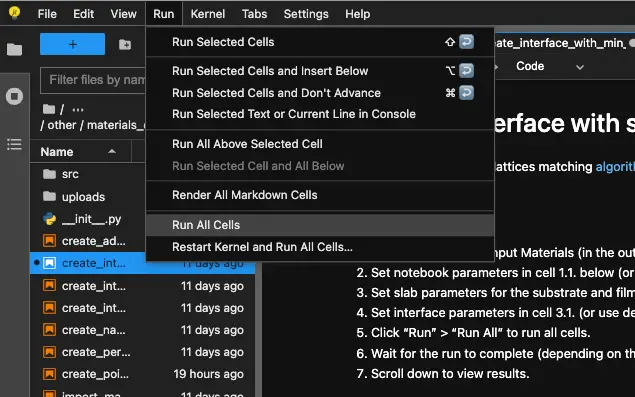
2. Analyze the Results.
After running the notebook, the slabs for different possible terminations should apper in the preview.
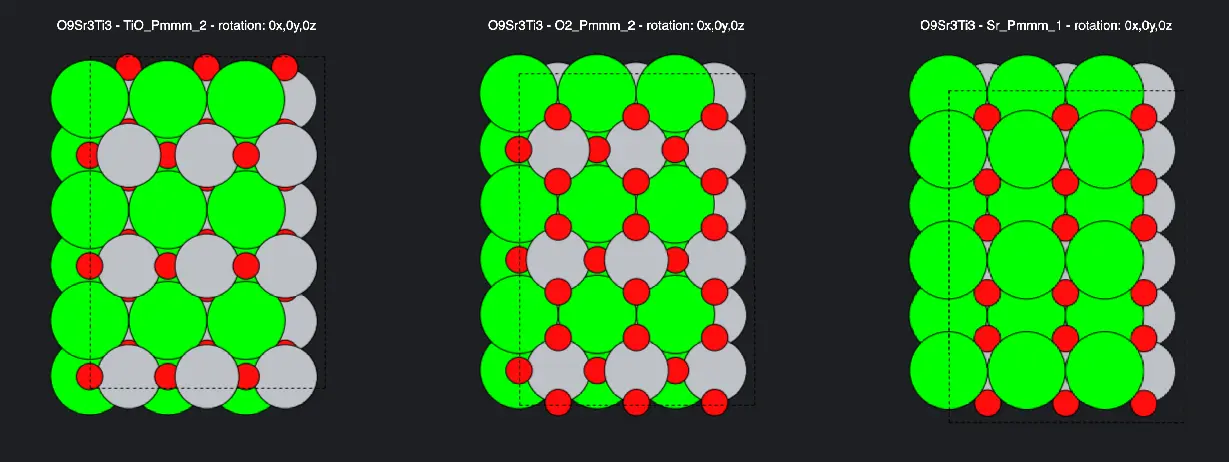
2.1. Select the desired termination.
If the interactive selection of terminations is enabled, select the desired termination from the list or change the TERMINATION_INDEX parameter in the notebook and rerun it.
3. Pass the Material to Materials Designer.
The user can pass the material with the selected termination in the current Materials Designer environment and save it.
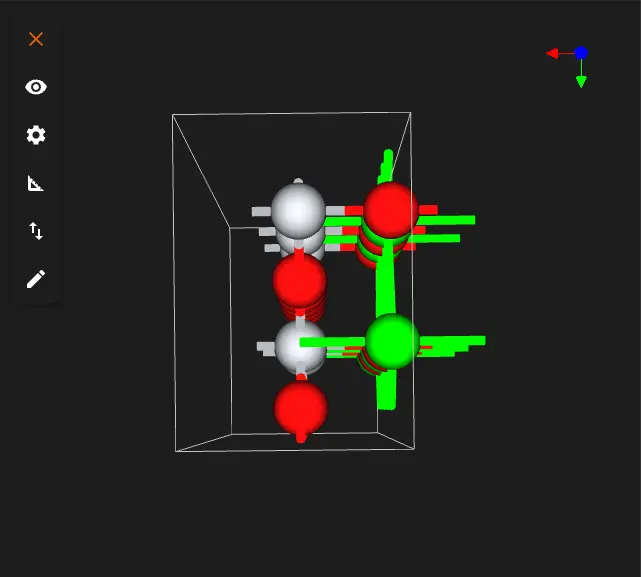
Or the user can save or download the material in Material JSON format or POSCAR format.
Interactive JupyterLite Notebook.
The following JupyterLite notebook demonstrates the process of creating strontium titanate slabs. Select "Run" > "Run All Cells".
References.
-
R. I. Eglitis and David Vanderbilt. First-principles calculations of atomic and electronic structure of srtio3 (001) and (011) surfaces. Phys. Rev. B, 77:195408, May 2008. URL: https://link.aps.org/doi/10.1103/PhysRevB.77.195408. ↩
-
Atashi B. Mukhopadhyay, Javier F. Sanz, and Charles B. Musgrave. First-principles calculations of structural and electronic properties of monoclinic hafnia surfaces. Phys. Rev. B, 73:115330, Mar 2006. URL: https://link.aps.org/doi/10.1103/PhysRevB.73.115330. ↩