Obtain force field with DeePMD to use in LAMMPS
In this tutorial, we demonstrate how to perform large-scale molecular dynamics simulation using Density Functional Theory, DeePMD, and LAMMPS in Mat3ra web platform. The workflow consists of the following steps:
- Perform *ab-initio* molecular dynamics calculation using Quantum
ESPRESSO Car-Parrinello (
cp.x) program - Prepare Quantum ESPRESSO output files for DeePMD using
dpdata, split data set into training and validation sets - Train DeePMD model, and freeze training results
- Transform Quantum ESPRESSO structure into LAMMPS format
- Perform classical molecular dynamics simulation using LAMMPS based on potential and force fields predicted by DeePMD.
1. Create Structure
For this demonstration, we create a new structure from scratch using material designer. Navigate to Materials page from the left sidebar, and click create new material. We may clone the default structure.
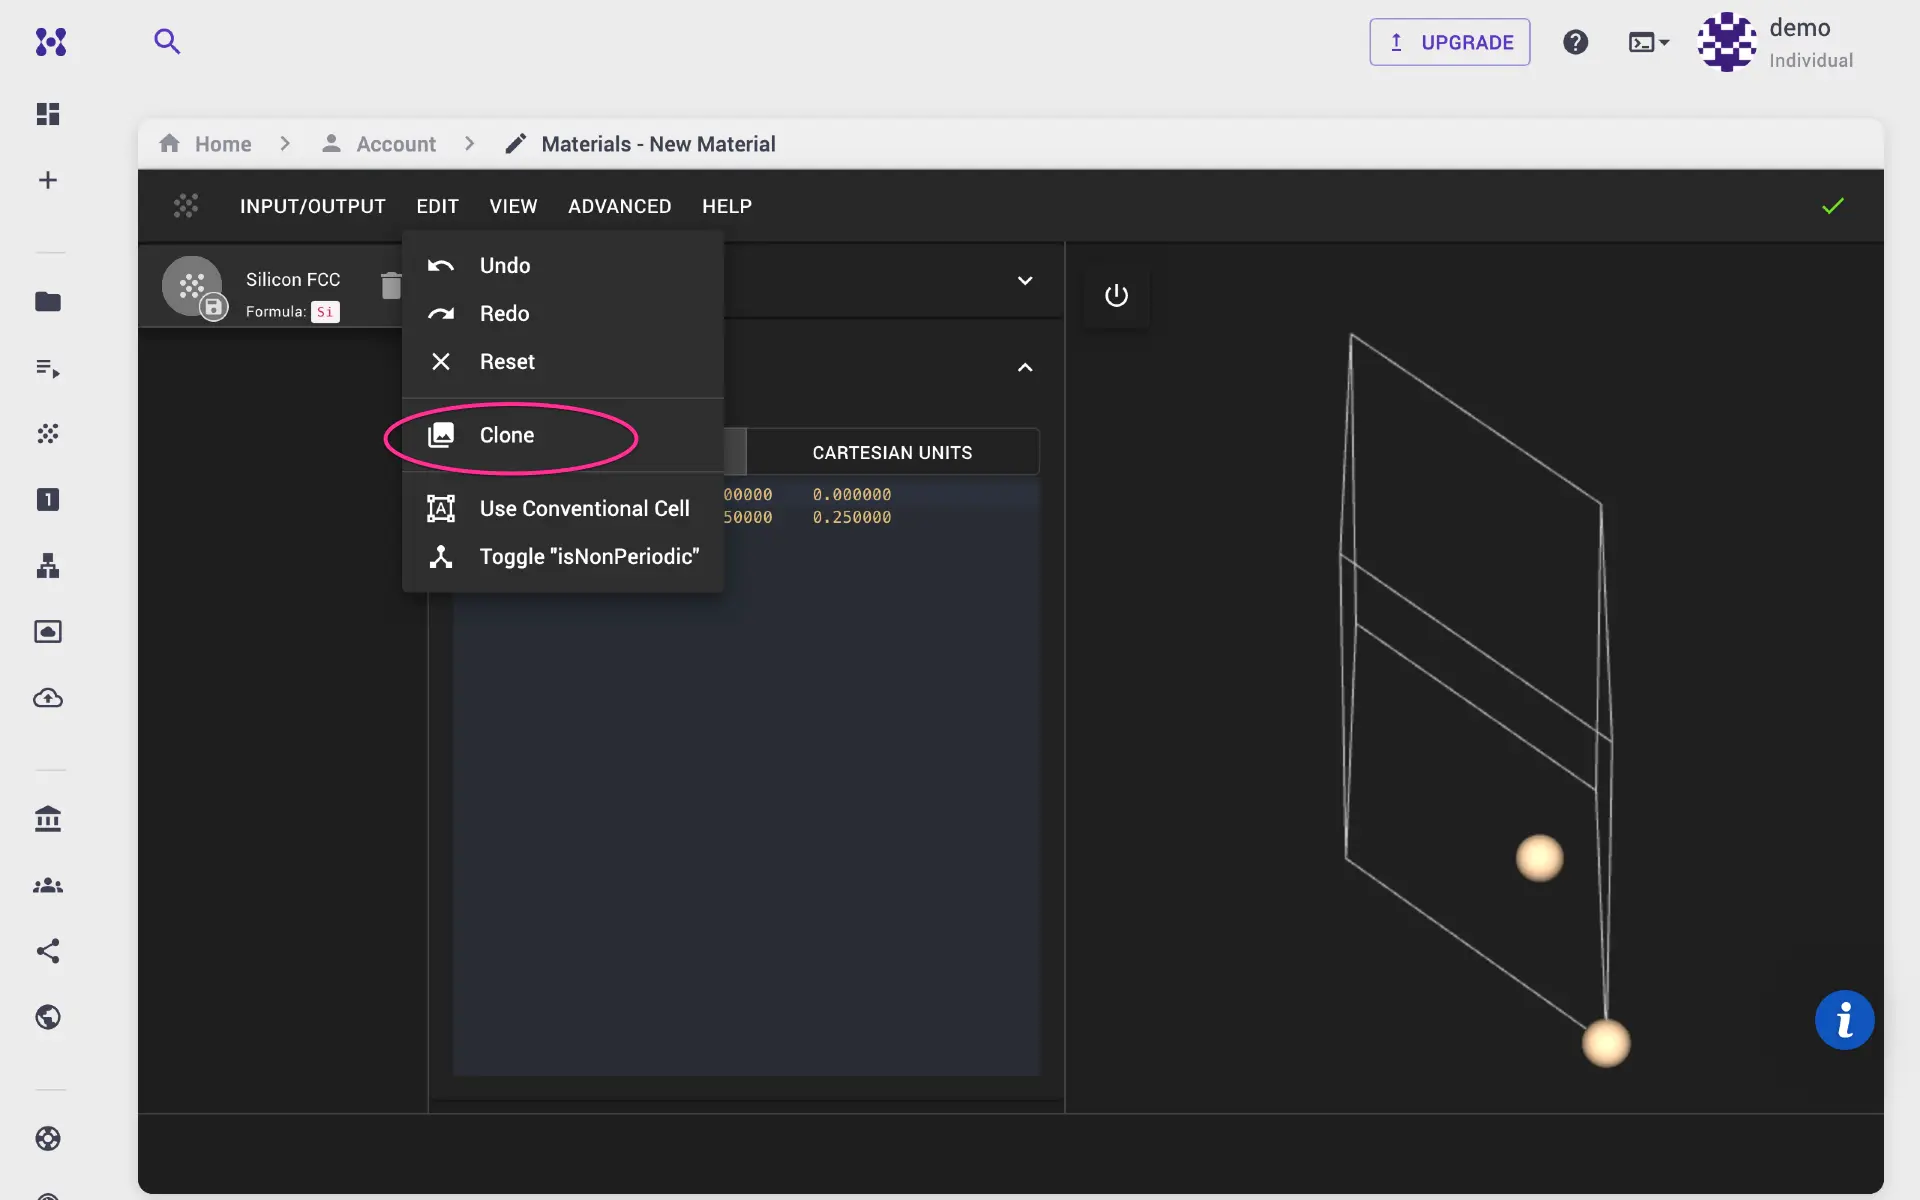
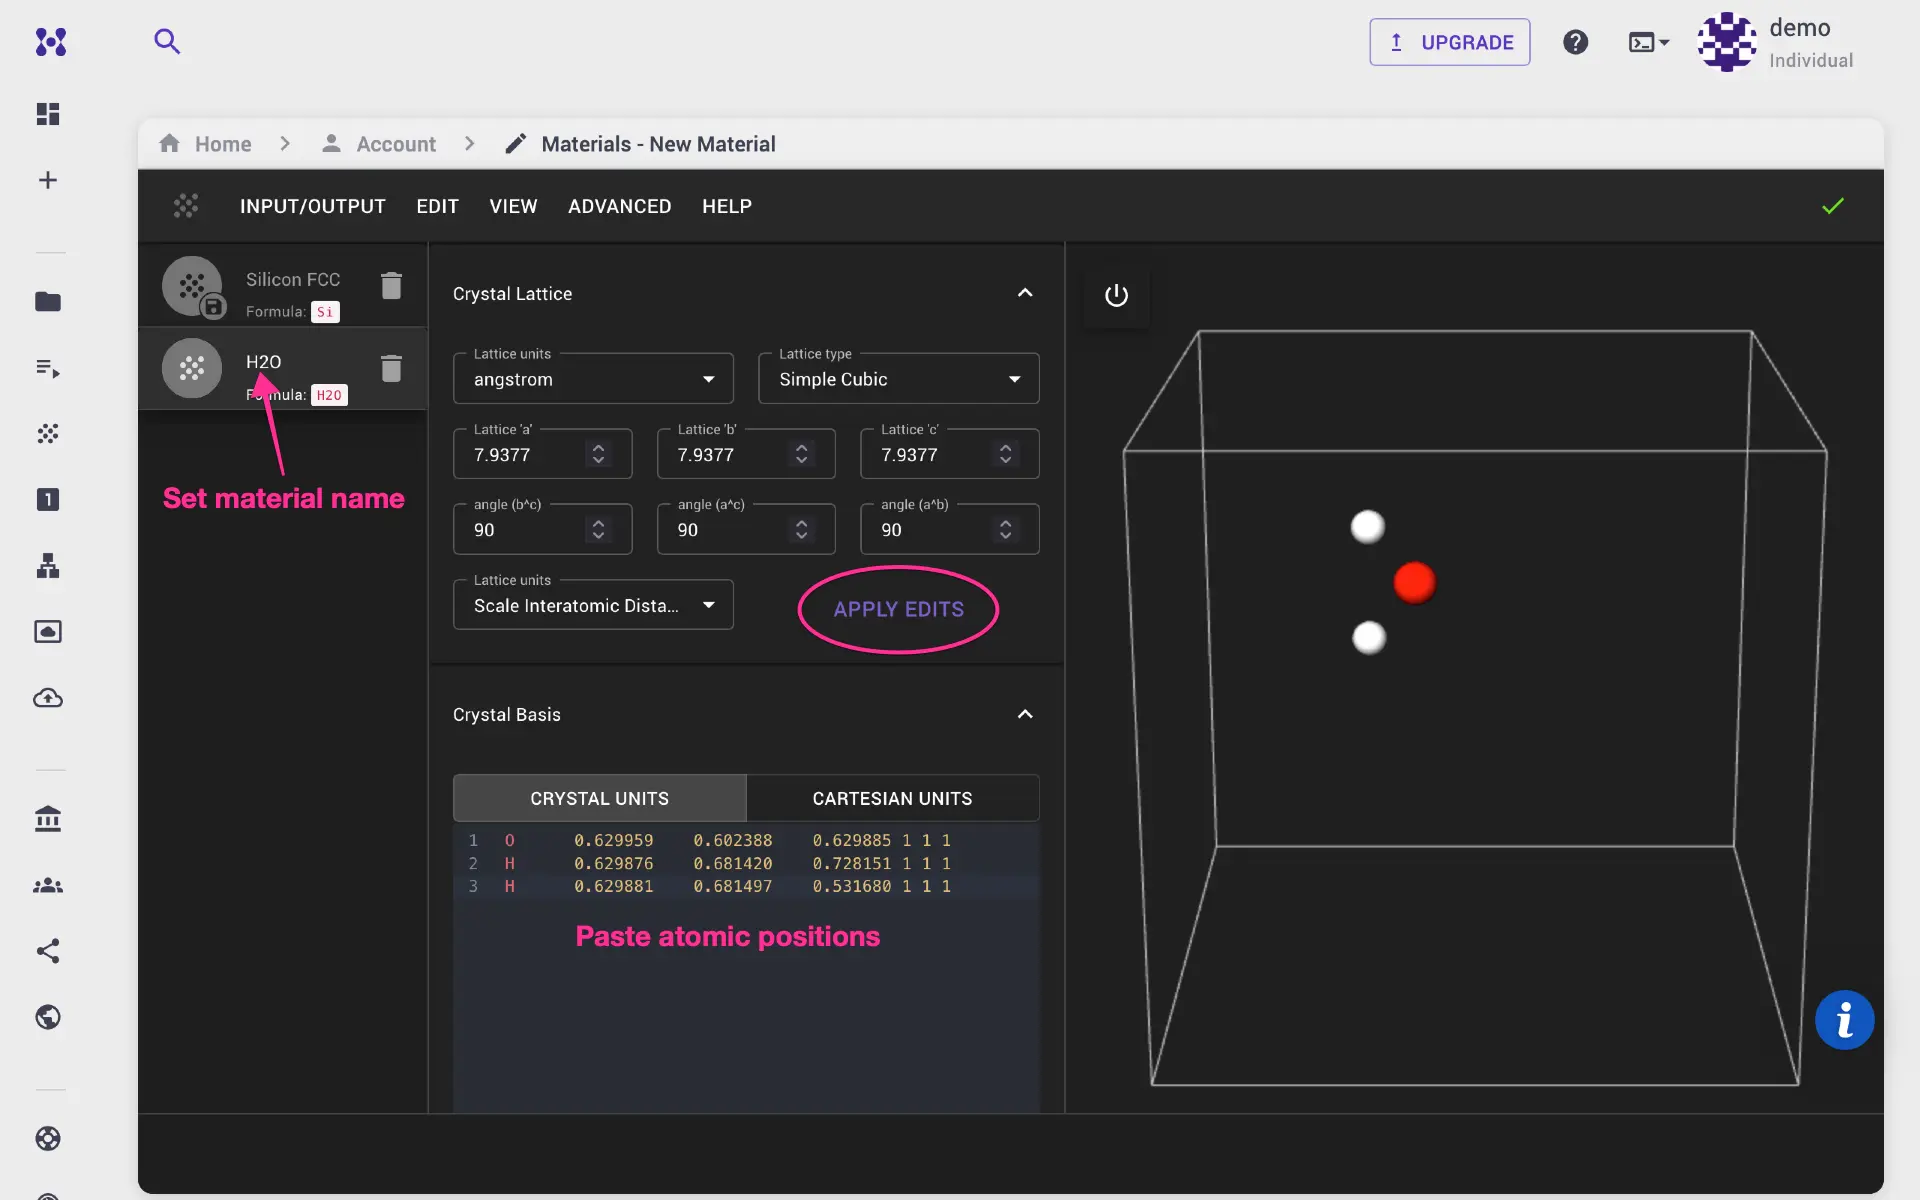
We use water molecule with simple cubic structure. Set lattice parameters, atomic positions, and click apply edits. Finally, go to Input/Output menu, and save the structure. Alternatively, user can import CIF or POSCAR structure files.
2. Create Workflow
2a. CP calculation
We perform ab-initio molecular dynamics calculation using Quantum ESPRESSO
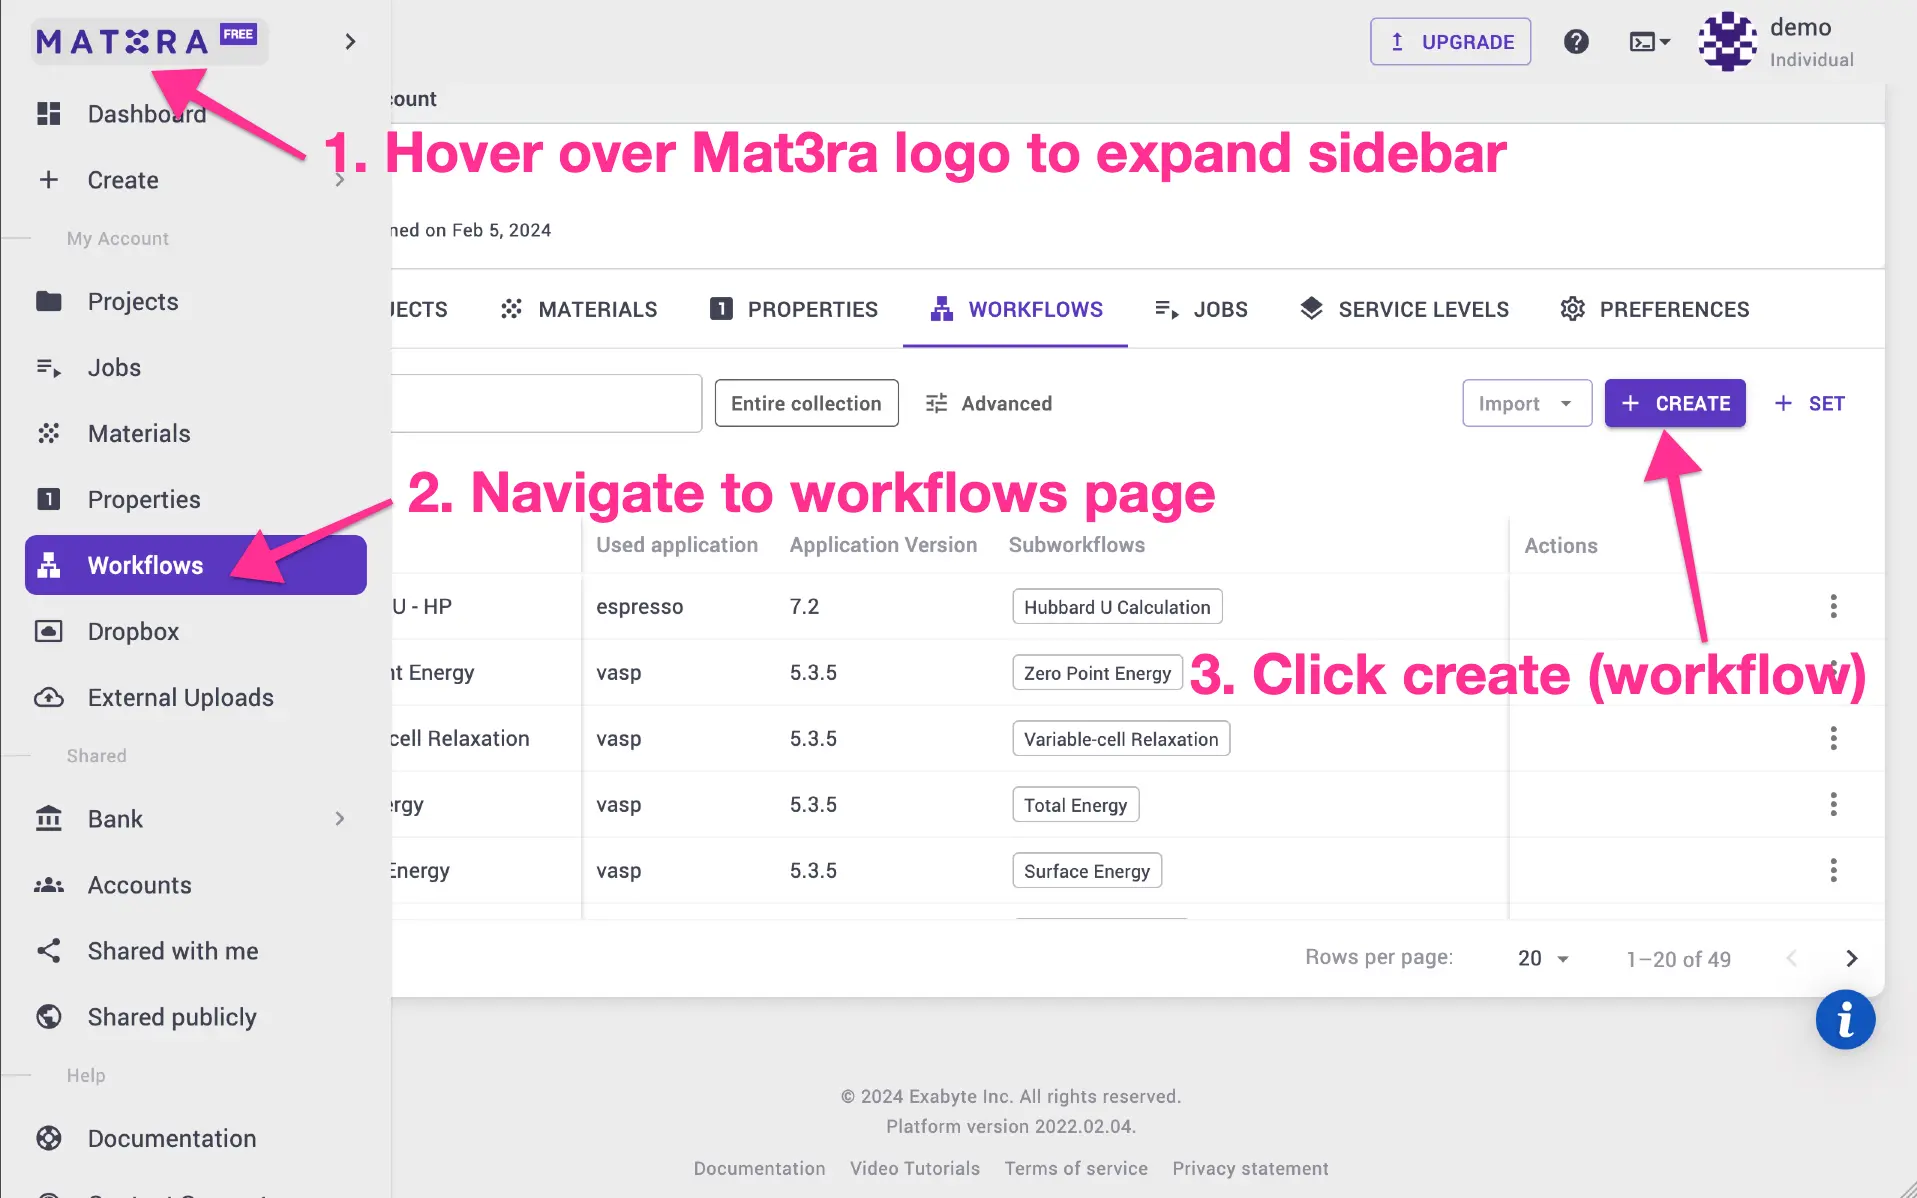
Car-Parrinello (cp.x) program. Navigate to workflows page, and click create
new workflow.
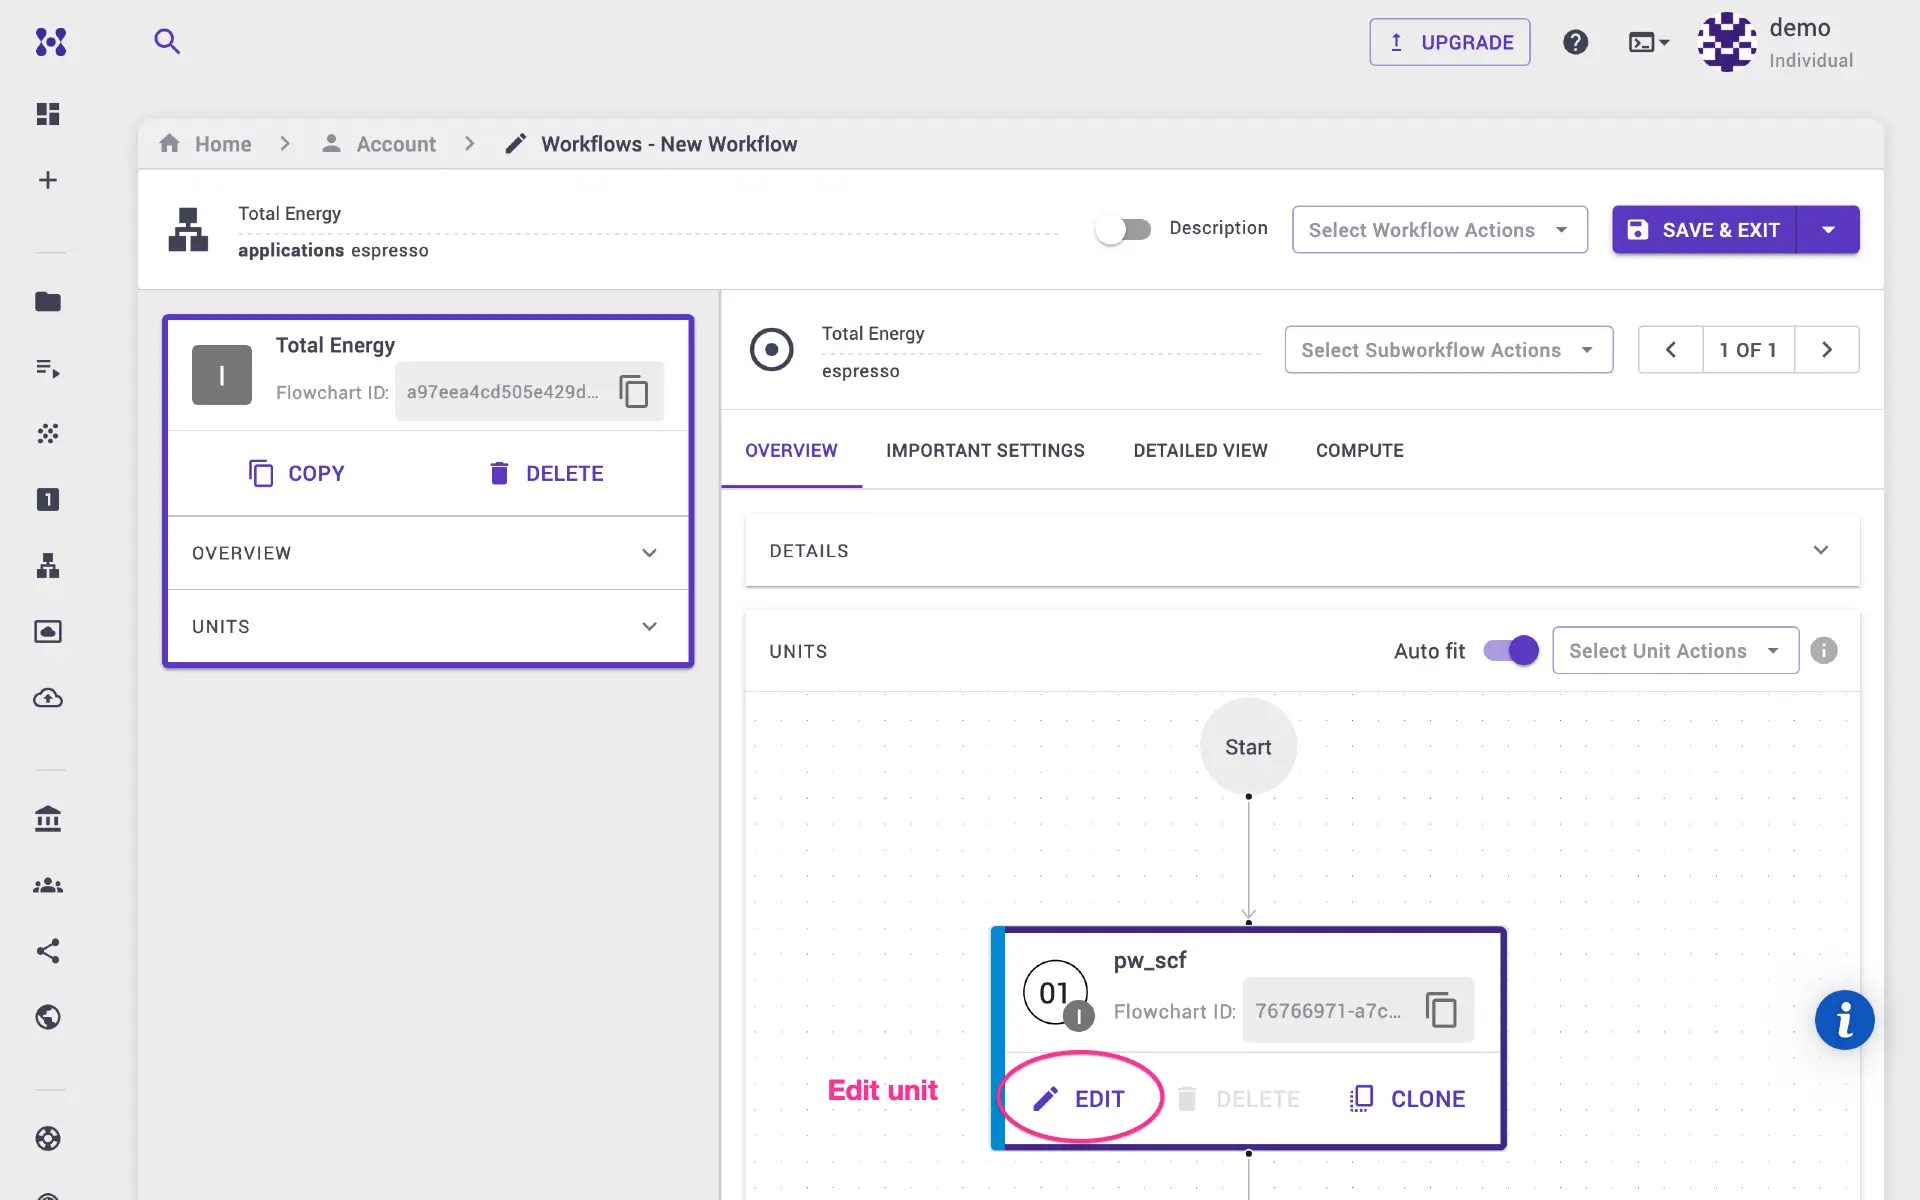
Click edit unit. On the unit modal, expand the details pane, and select
executable to cp.x We set prefix and unit name to cp so that various
output files have the same base name (e.g., cp.out, cp.for, etc.).
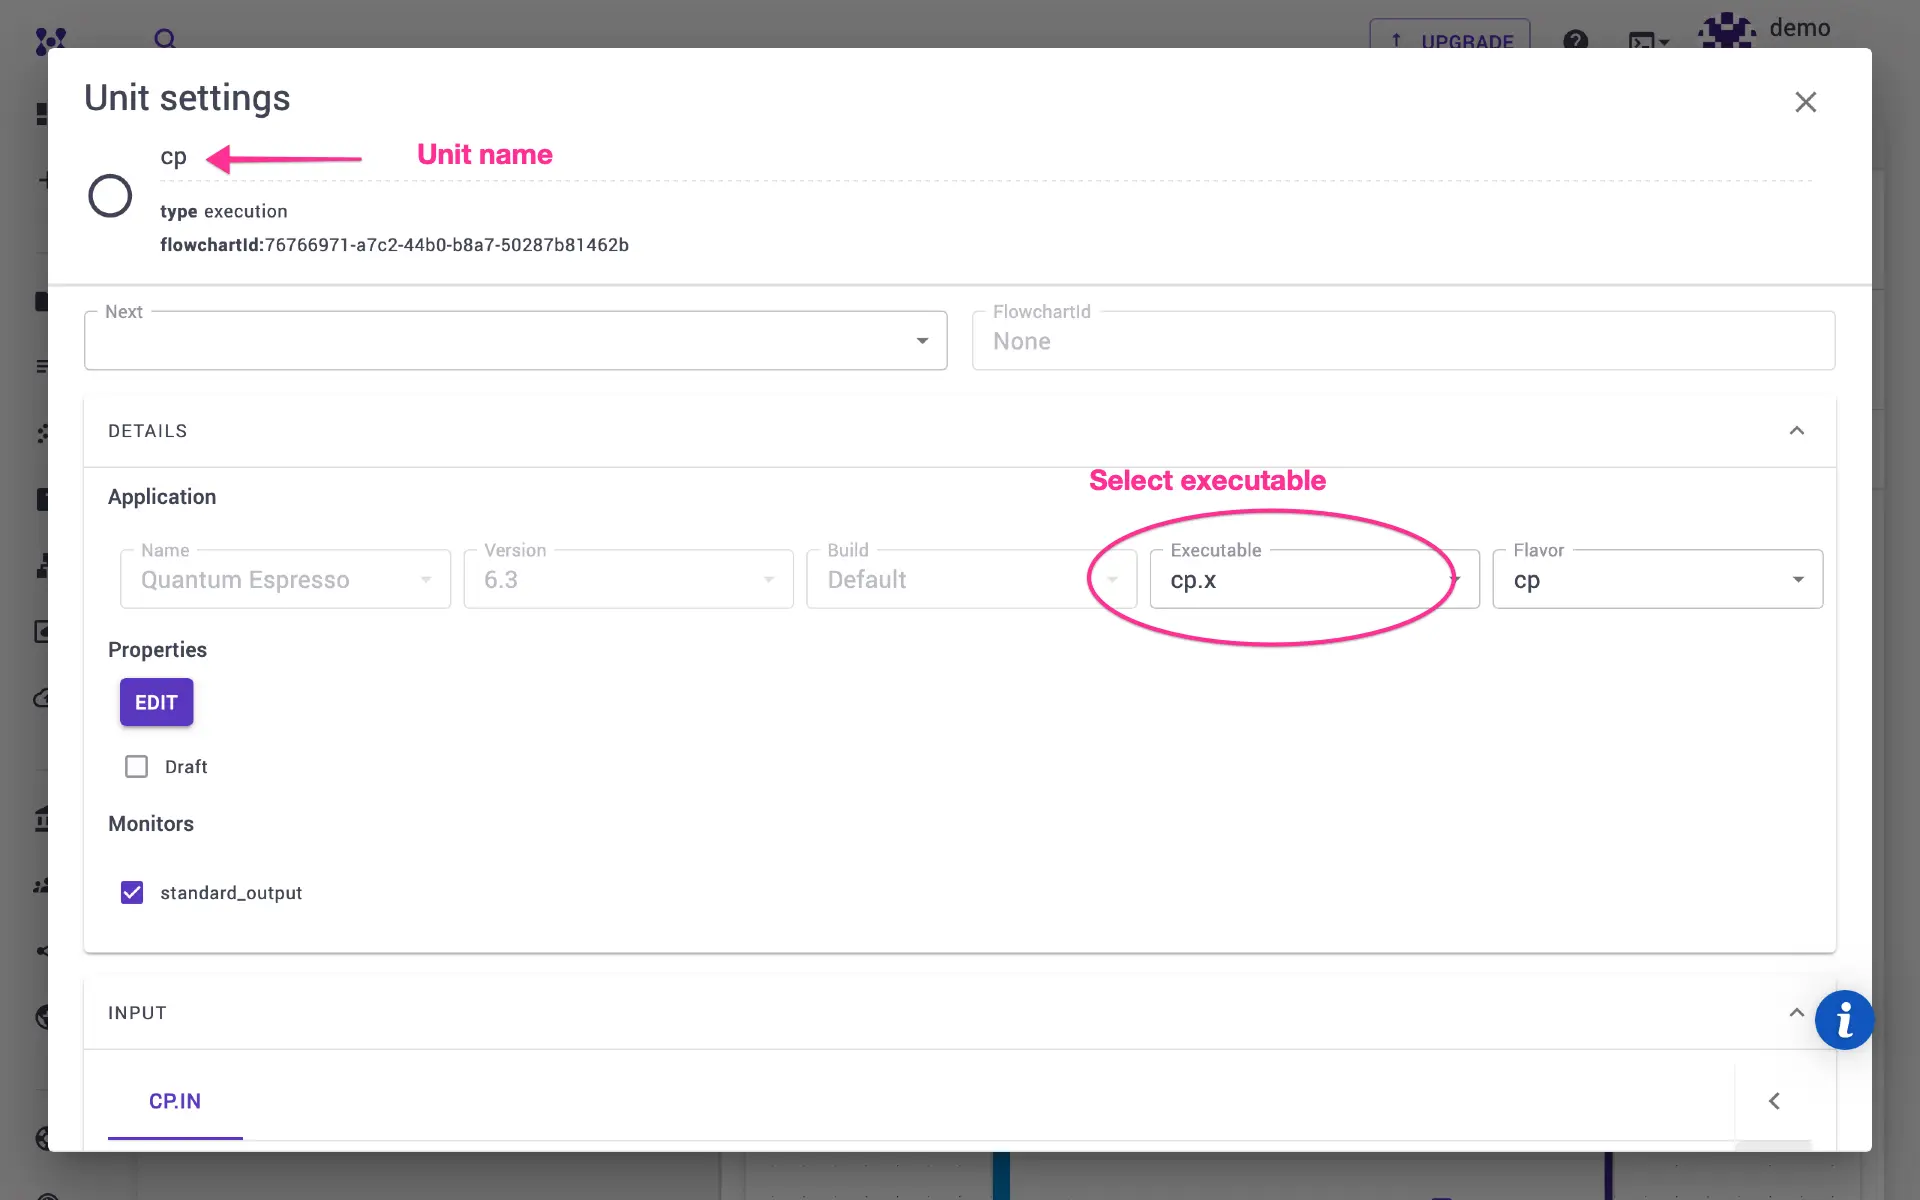
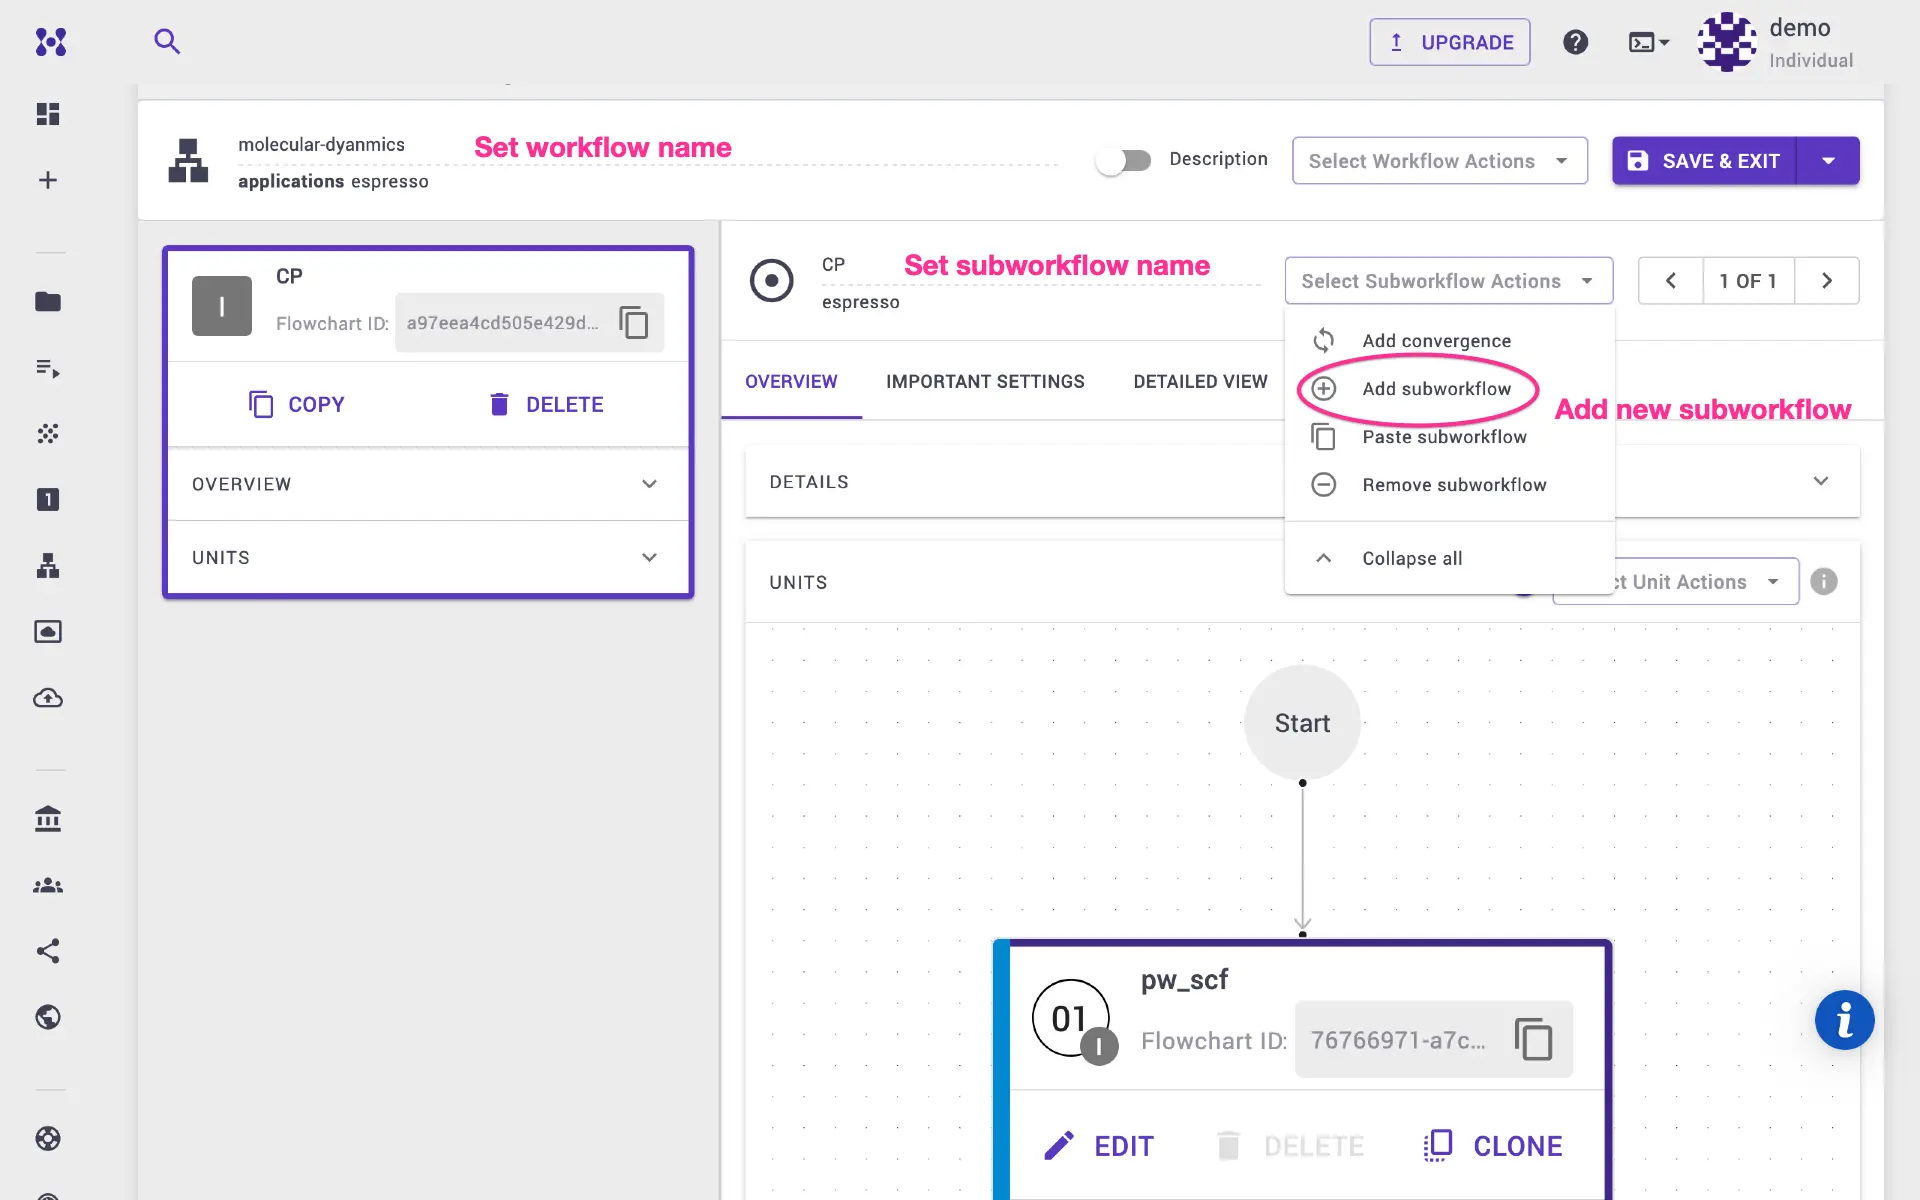
Some of the CP parameters such as the number of steps, time step, etc. can be set in the Important Settings tab. Users can modify or add additional parameters directly on the template on the unit modal. Close the unit modal, and return to workflows page. Set Quantum ESPRESSO version (e.g., 7.3) and build (e.g., GNU).
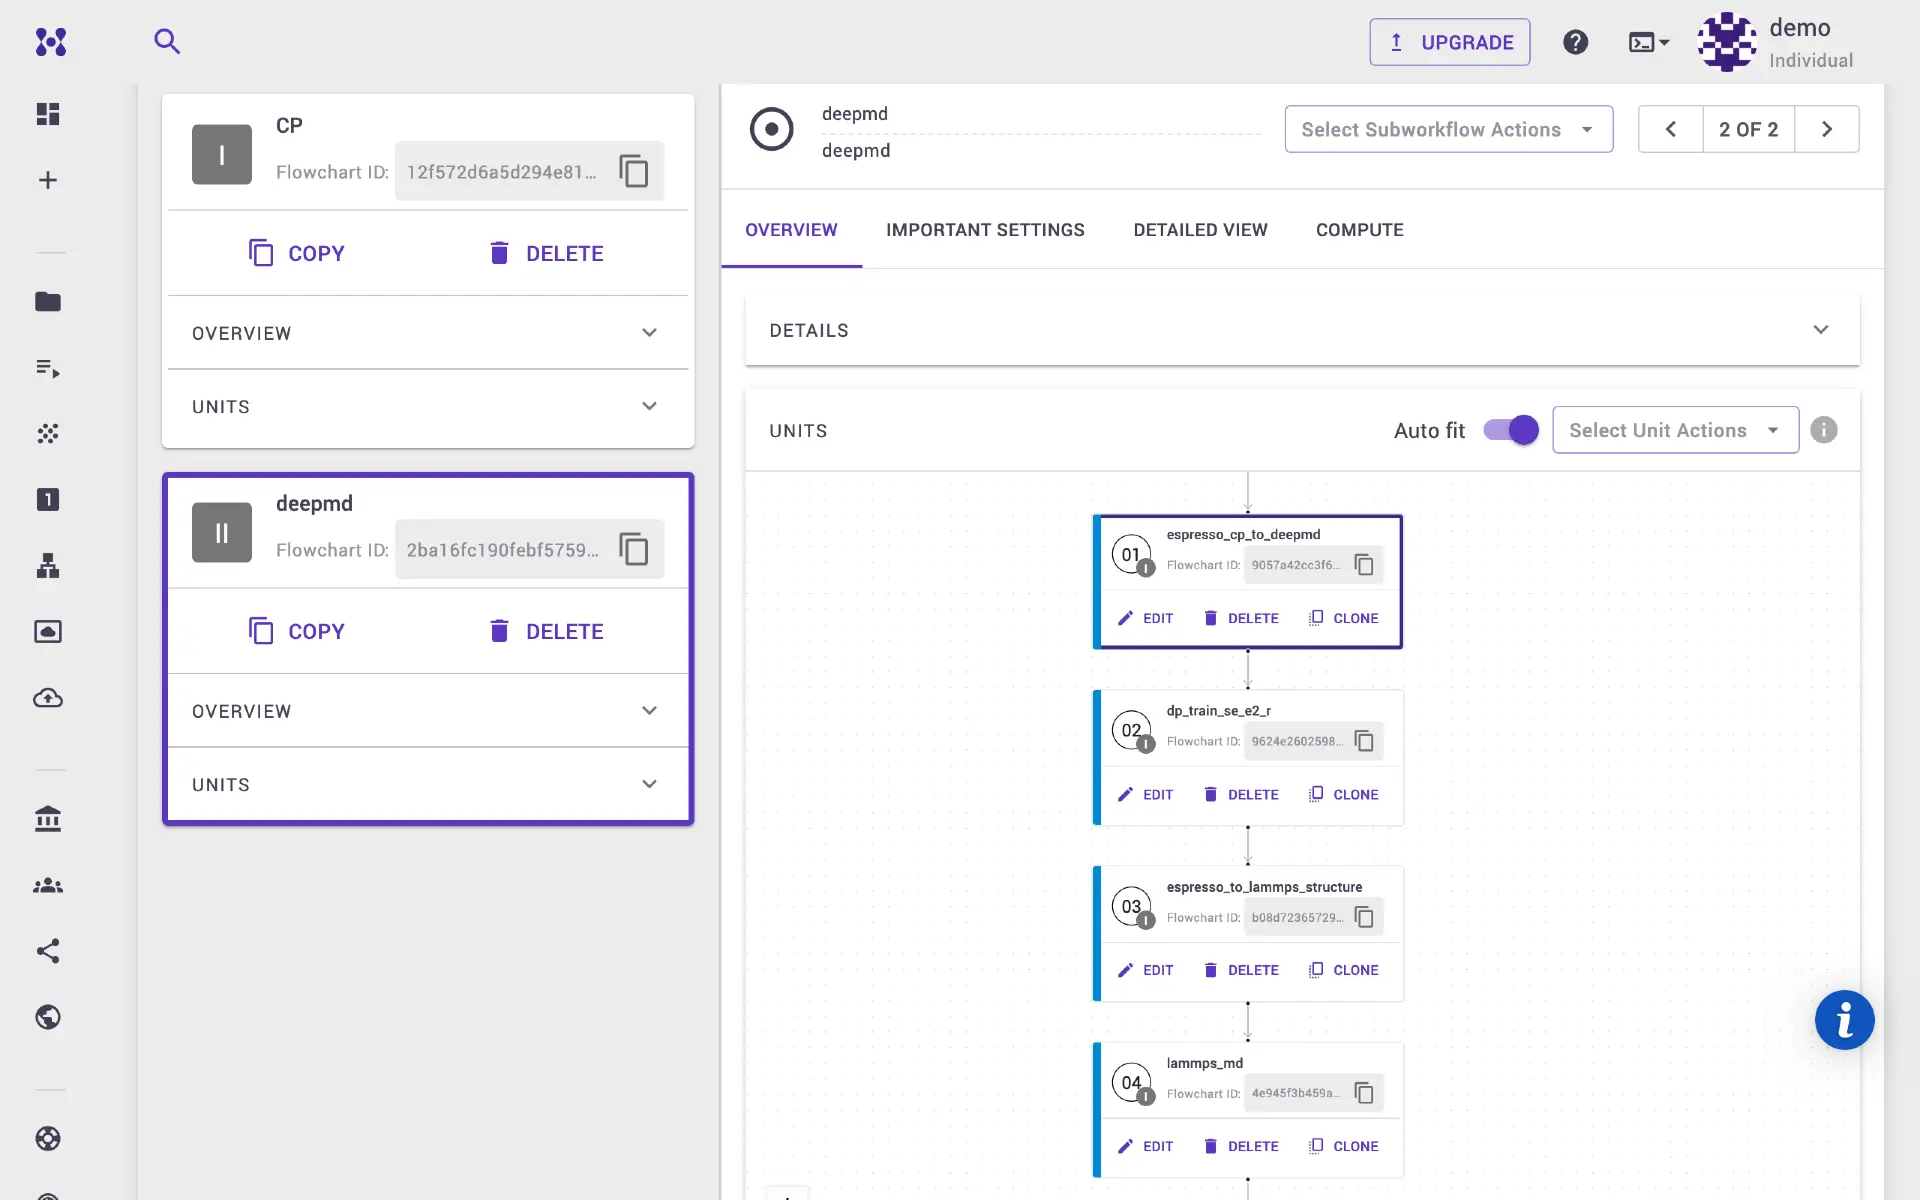
For the next steps, we need to use another executable (deepmd), so we will add new subworkflow and select deepmd application.
2b. Prepare data sets for DeePMD
We will use Python script and dpdata to load the Quantum ESPRESSO output files
obtained in the previous CP calculation step. Add first unit to deepmd
subworkflow.
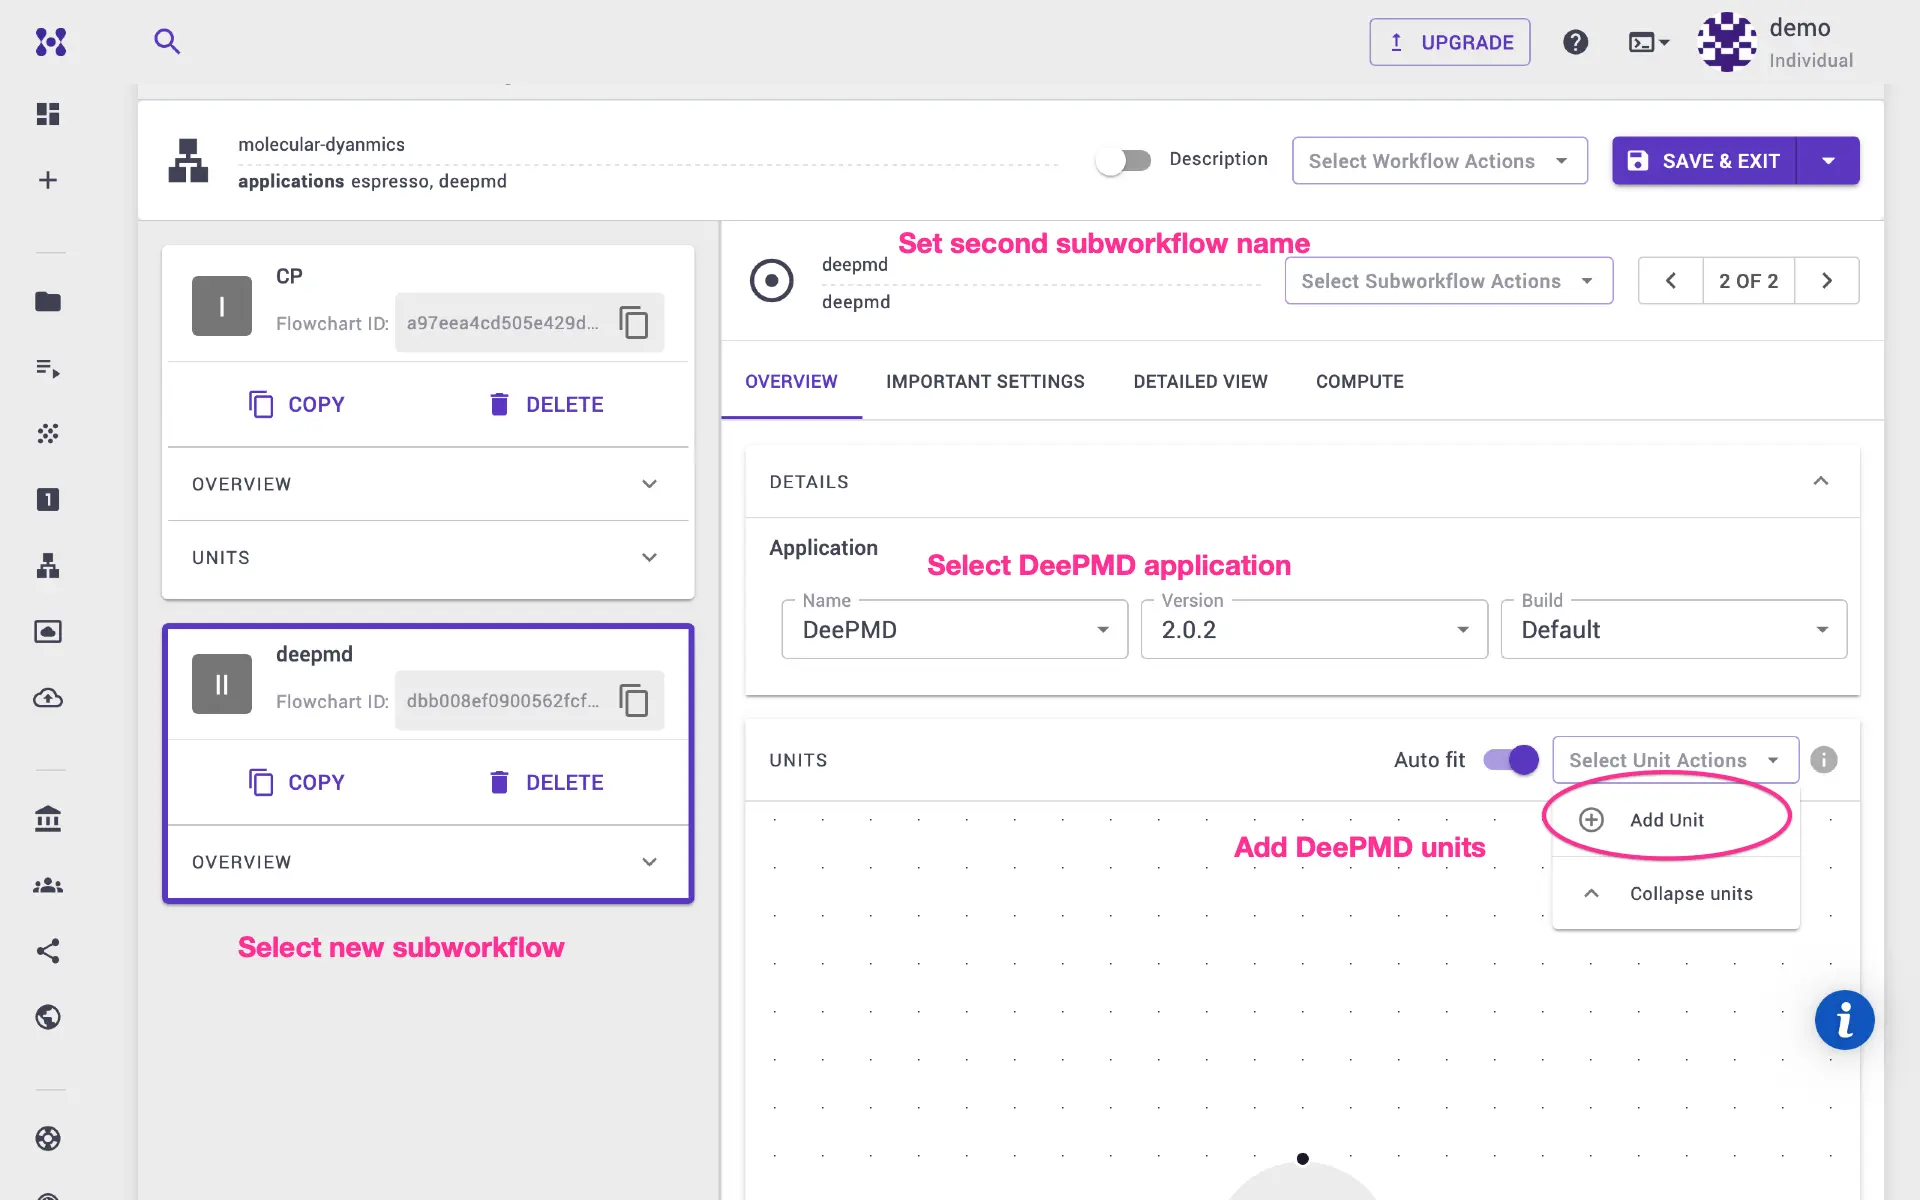
Select executable to python and flavor to espresso_cp_to_deepmd.
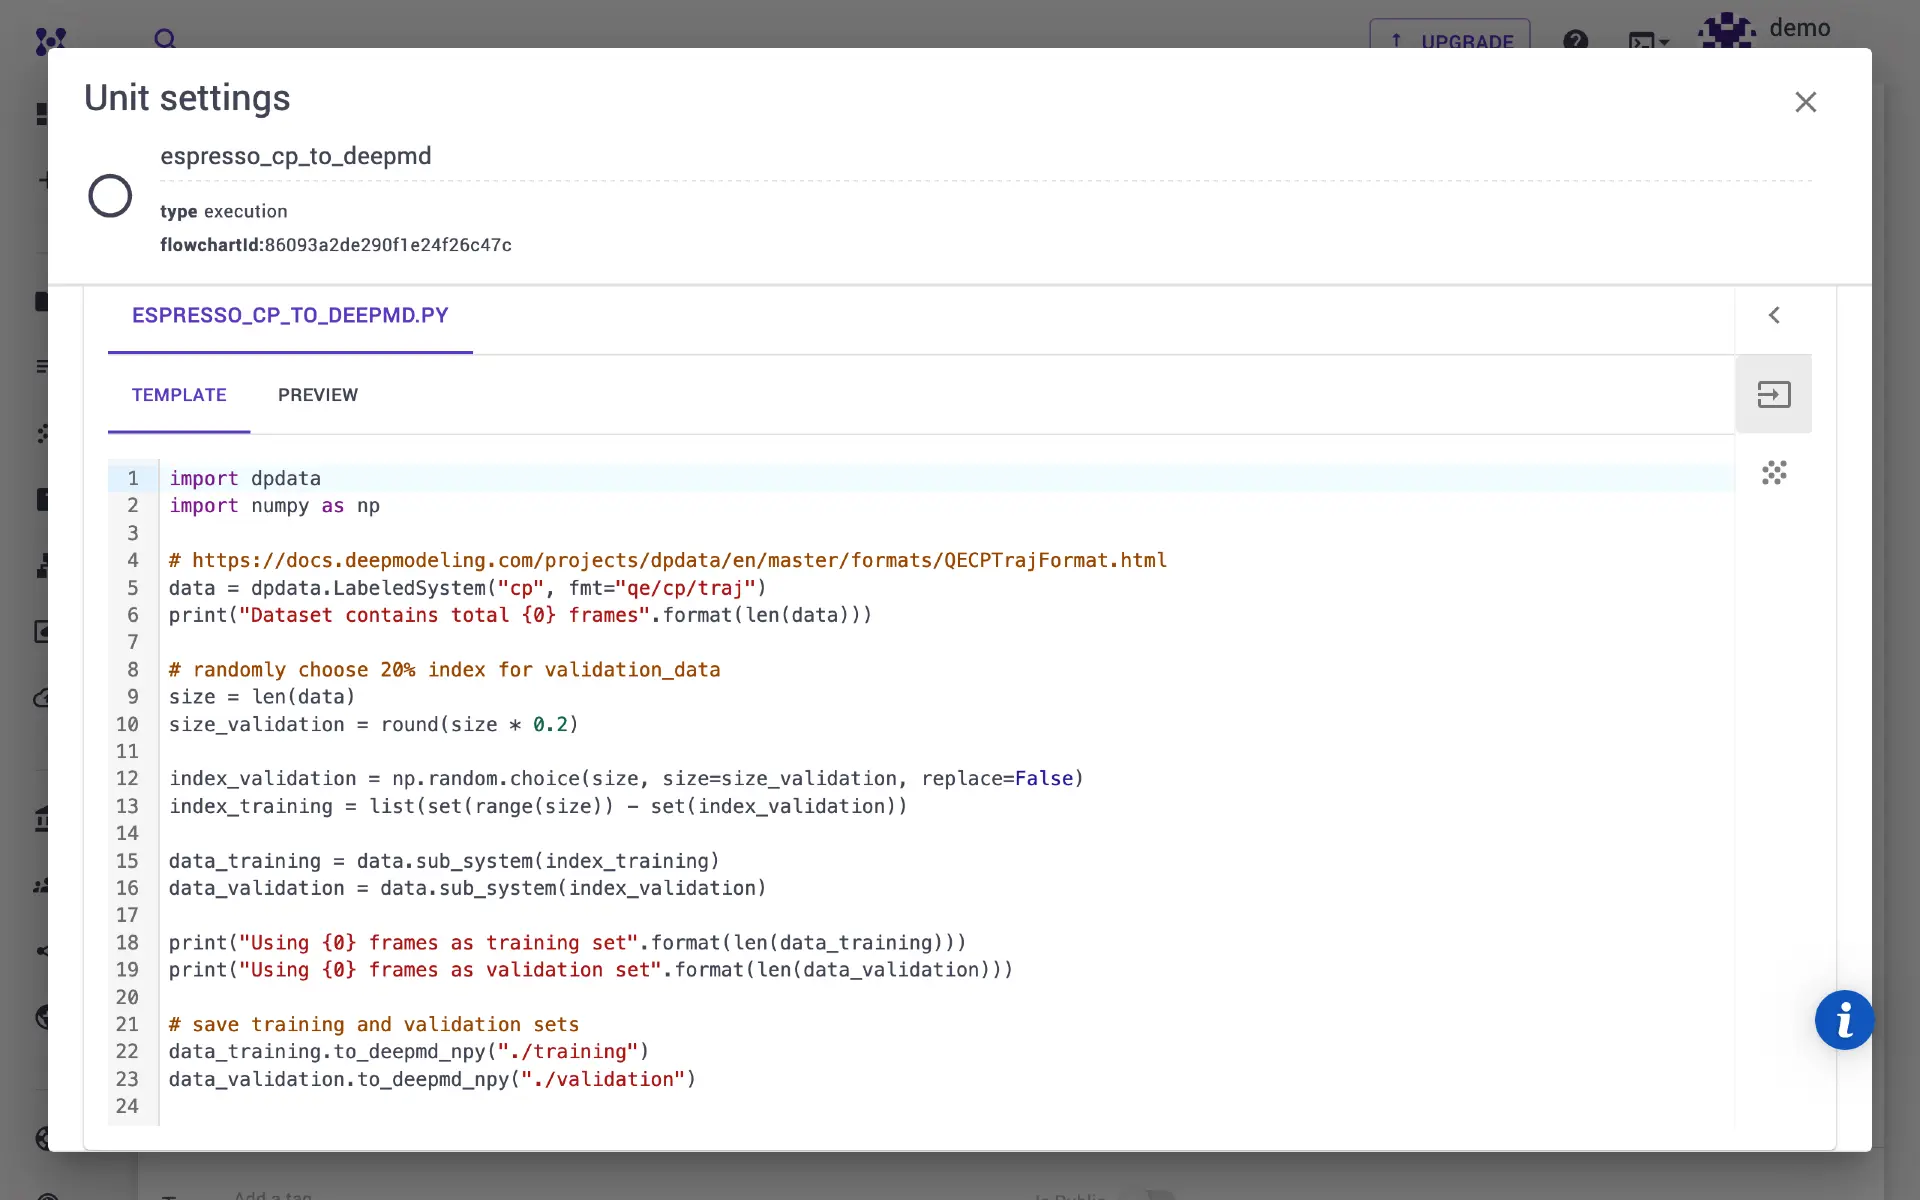
We will split the available number of molecular dynamics steps into training and validation sets (80% and 20%, respectively). One can modify the python script/ template directly in the unit modal, and adjust the ratio between sets.
2c. Run DeePMD model
We need to specify the descriptor and related model parameters here. Append
another execution unit to deepmd subworkflow. This time select dp
executable. Set the descriptor and various model parameters. After the training
step is executed, the output is saved into graph.pb file.
2d. Prepare LAMMPS structure
Here we will again use Python script to prepare input structure for LAMMPS
calculation. Again add new executable unit, select python executable and
espresso_to_lammps_structure. We use dpdata to convert the Quantum
ESPRESSO input file in the first step into LAMMPS format. User can extend the
structure, build supercell, or hardcode the structure and save it to
system.lmp file.
2e. LAMMPS calculation
Finally, we perform classical molecular dynamics calculation using LAMMPS.
LAMMPS parameters can be adjusted in in.lammps input template. Add the final
unit, and select lmp executable. We use deepmd pair style. We can adjust
LAMMPS parameters in the template. The LAMMPS output is written to
system.dump.
3. Create and submit job
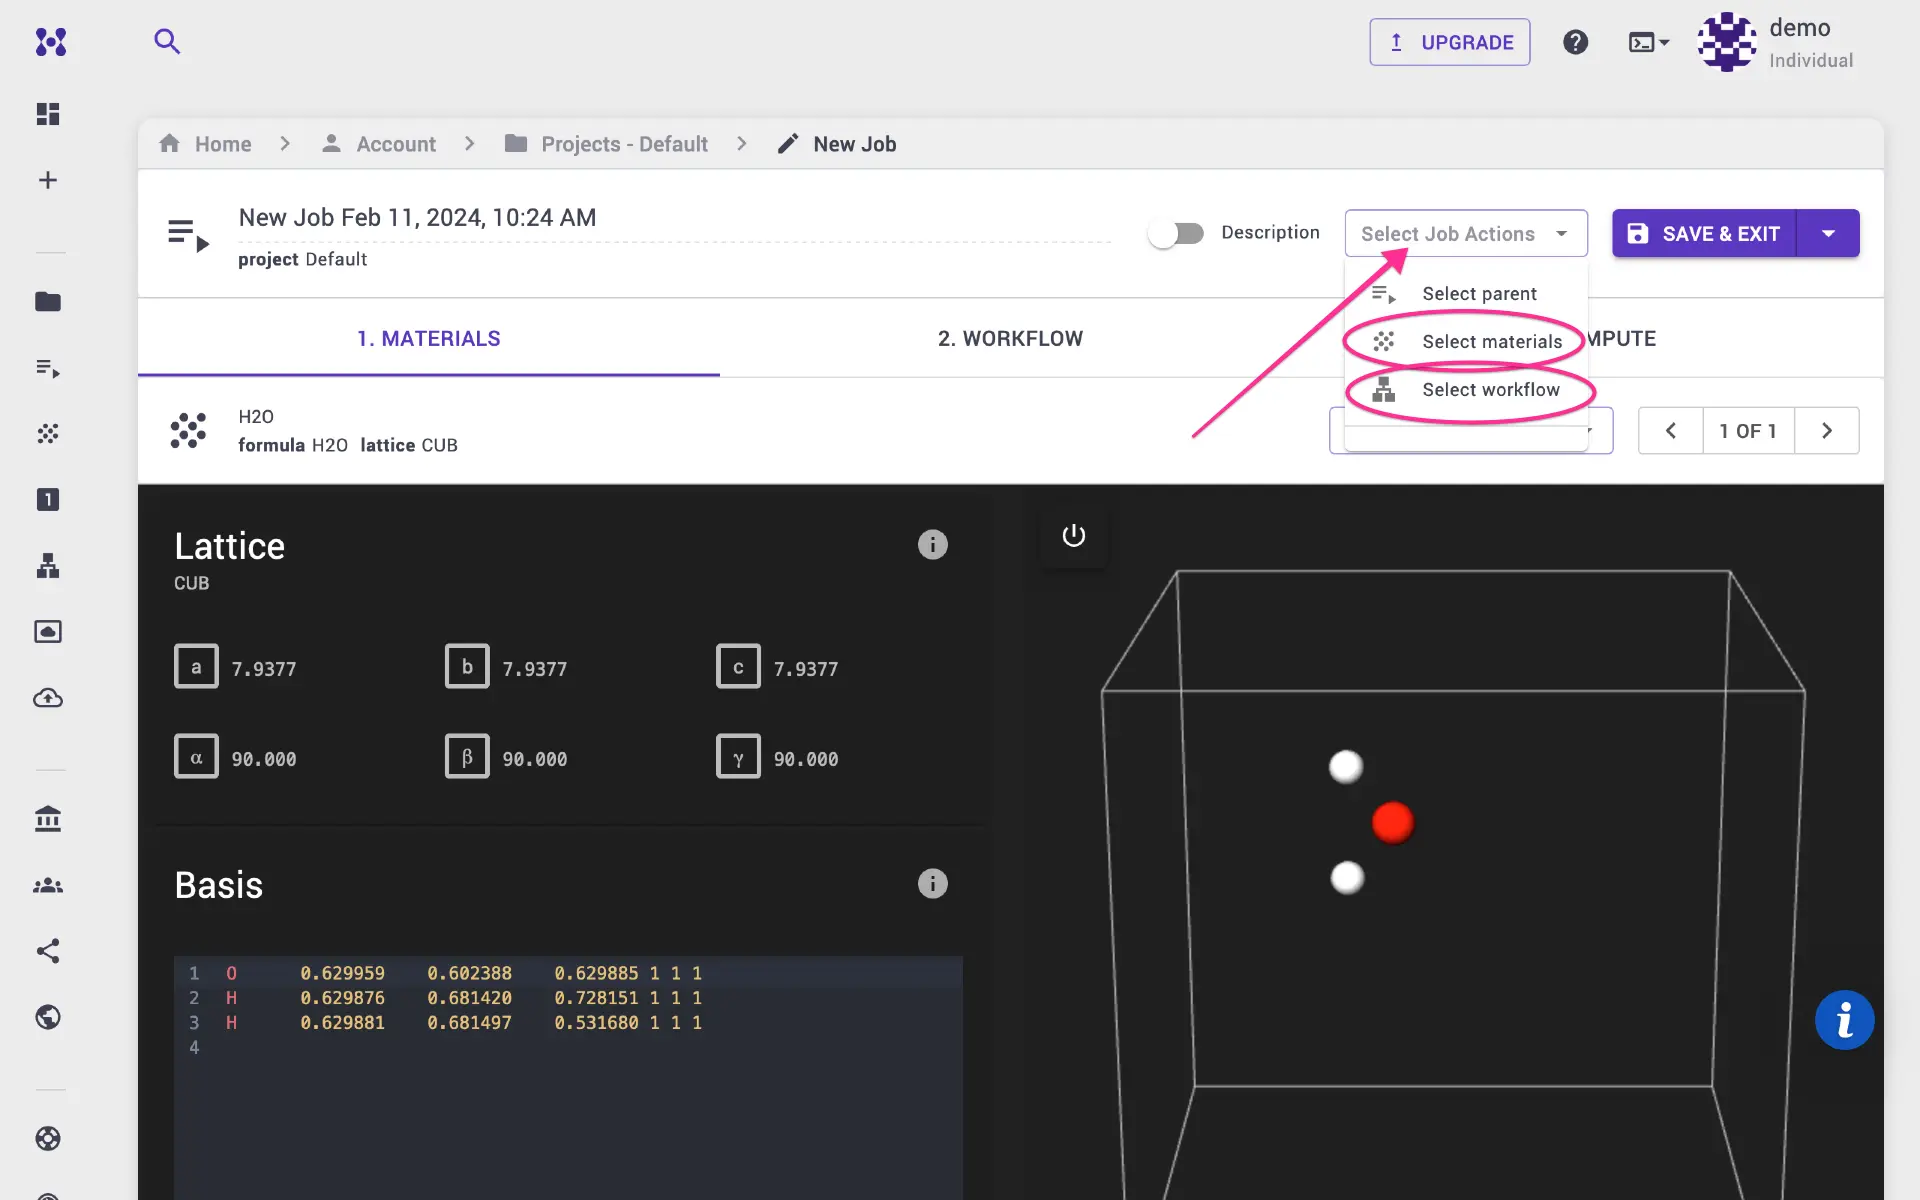
Navigate to Jobs page from the left sidebar. Click create new job. Select material (in our case, H2O structure we created), select molecular-dynamics workflow that we created in the previous step. Navigate compute tab adjust compute parameters such as queue, number of nodes and processors. Submit job for execution. Once the job is completed, various output files are placed under the Files tab of the jobs page. Users may launch a Jupyter Notebook session in our platform to further analyze output files.
4. Step-by-step screenshare video
In the below animation, we walk you through the whole workflow process.